
Reviewed · GINZA TOURS
Chopstick Making Workshop in Ginza
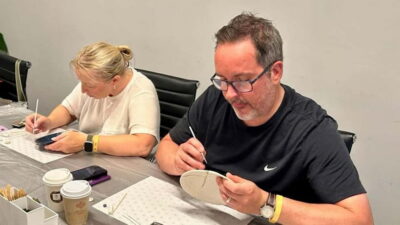
Making chopsticks sounds simple until you put a wooden blank on a stand and start shaving it with a hand plane. This Ginza workshop gives you a real piece of woodworking, not a quick souvenir assembly line. You choose the wood, shape both sticks, sand the corners, add oil, and take the finished pair home the same day.
I like the wide choice of wood, with 24 types and two lengths available. I also like the practical result: this is a souvenir you can use at home, not something that sits in a drawer. The optional name engraving, done in Japanese or your own language, gives the finished pair a personal touch.
The main thing to know is that this takes some arm strength and patience. The plane is a hand tool, so you may need to press firmly and make many passes. Most people finish in about an hour, but careful sanding can take longer, and the extra-cost woods and engraving can raise the final bill above the advertised $25.
In This Review
- Key Points Before You Book
- A Small Woodworking Class in the Heart of Ginza
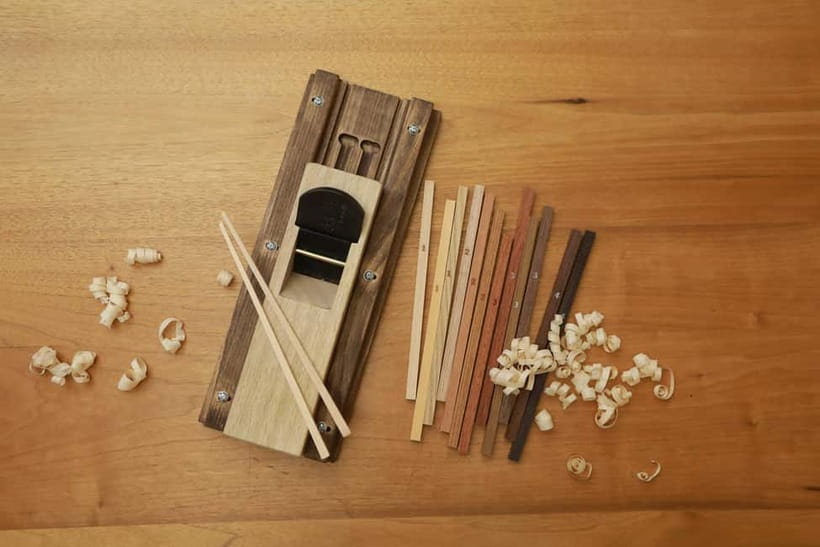
- Step One: Comparing 24 Types of Wood
- Step Two: Learning to Use the Hand Plane
- Step Three: Sanding the Tips and Corners
- Step Four: Oil for the Final Finish
- Optional Engraving in Japanese or Your Own Language
- What the $25 Price Really Includes
- Families, Teenagers, and Older Participants
- Timing, Cancellation, and Practical Details
- How This Compares With Buying Chopsticks
- Should You Book the Ginza Chopstick Workshop?
- FAQ
- Where is the chopstick-making workshop located?
- How long does the workshop take?
- What does the $25 price include?
- How many types of wood can I choose from?
- Does engraving cost extra?
- Can I take the chopsticks home the same day?
- Is English instruction available?
- Who should not take this activity?
Key Points Before You Book
- Choose your wood first: Five wood types are included in the base price, while 19 higher-grade options cost extra.
- Expect real handwork: You shape the chopsticks with a plane, then smooth them with sandpaper.
- Use the two lengths to fit your needs: The available sizes let you make a pair suited to different users.
- Add a personal finish: Name or phrase engraving costs an additional ¥1,100 per pair.
- Plan for a little exercise: Several people found the planing stage demanding, especially with harder wood.
- English help is available: Staff explain each step in English and Japanese, with instructors such as Tina, Waka, Kotoha, Shion, and Koko mentioned for their patient assistance.
A Small Woodworking Class in the Heart of Ginza
The workshop is at 2-9-13 Ginza, Chuo-ku, Tokyo, putting you right in one of Tokyo’s best-known shopping districts. That location makes this an easy one-hour activity to fit between department stores, cafés, museums, or a meal.
The setting is focused on woodworking rather than a broad cultural demonstration. The company handles the wood selection and processing in-house, so the workshop has a clear connection to the materials you are using. You are not simply decorating a pre-made pair. You begin with shaped wood and finish it by hand.
That distinction matters. If you want a polished cultural show with little effort, this may feel more physical than expected. If you like making things, it gives you a better sense of how a simple everyday object is formed.
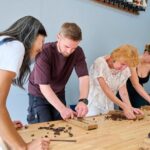
The space can feel busy when many people are working at once. Staff move between participants at different stages, helping with planing, sanding, and finishing. At quieter times, the relaxed pace makes it easier to ask questions and take care with the details.
A few more Tokyo tours and experiences worth a look


Step One: Comparing 24 Types of Wood
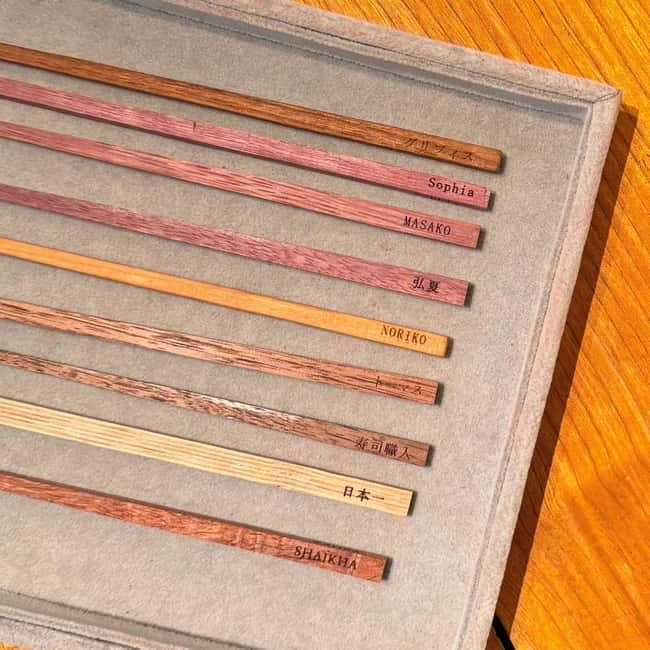
Your first decision is the wood. You can choose from 24 types and two lengths. Five wood options are included in the standard price, while the other 19 are higher-grade woods with an added charge.
This is the most important point to clarify before you start. The low advertised price covers the workshop and the included wood, but many of the more distinctive choices cost extra. If you have a particular preference, ask the staff about the surcharge before selecting it.
The wood choice affects both appearance and effort. Softer wood is likely to be easier to shape, while harder varieties require more pressure and patience. One participant chose olive wood and found it difficult to work, but was pleased with the final result. That is useful advice if you are tempted by an attractive specialty wood: the prettiest grain may not be the easiest for a first attempt.
You also choose the length. The two sizes let you make a pair that feels right for you or for the person receiving it. If you are making a family set, different lengths can help distinguish each person’s pair.
Take a moment at this stage. Look at the grain, ask about the wood, and decide if the appearance is worth any additional cost. Once the shaping begins, the character of the wood becomes part of the work.
Step Two: Learning to Use the Hand Plane
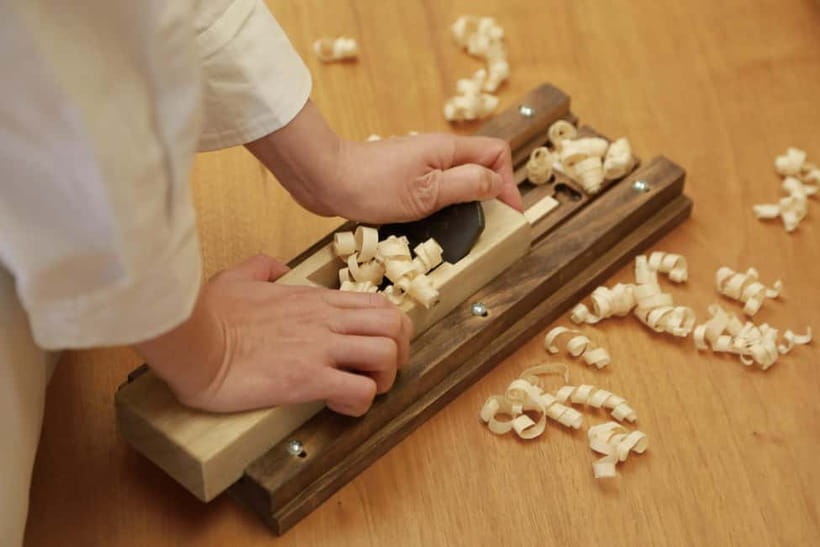
The main task is planing. You place the chopsticks on a stand and run a plane along the wood, shaving away thin layers. The aim is to bring the pair toward a useful shape while keeping the sticks even.
This is where the workshop becomes more than a craft souvenir. You need to control the direction of the tool and apply steady pressure. It is not difficult to understand, but it can be tiring. A 12-year-old participant needed time to learn how much force to use, then became comfortable and proud of the result.
You may also find that a chopstick shifts or flips while you work. That can be confusing at first, especially when you are unsure which side should face upward. The instructors can correct your position and show you how to continue.
The English-speaking staff are an important part of the experience. Instructions are given step by step, and help is available when the tool feels awkward. Waka was singled out for patient, professional guidance, while Tina and other staff members were praised for being friendly and attentive. Names and staffing can vary, but you can expect English and Japanese support.
Do not rush this part. The workshop is designed for beginners, and staff generally let you continue until the shape feels right. Some people finish close to the one-hour mark. Others spend longer on precision work, and at least one participant stayed for about two hours while making a second pair and sanding carefully.
Step Three: Sanding the Tips and Corners
Once the basic shape is formed, you use sandpaper to smooth the tips and corners. This stage may look minor, but it has a big effect on how the finished chopsticks feel in your hand.
The plane leaves working marks and sharper edges. Sanding removes those rough areas and lets you refine the shape. You can make the pair feel more balanced and comfortable by paying attention to both sticks instead of stopping as soon as they look finished.
This is also the calmest part of the activity. The physical effort eases, and you can work at your own pace. If you enjoy careful crafts, sanding may be your favorite stage. If you prefer quick activities, it can feel repetitive.
I recommend saving enough time for it. A rushed pair may still look good, but careful smoothing is what turns a basic handmade souvenir into something you will want to use regularly.
Long hair should be tied back. One participant described the process as surprisingly sporty, particularly through the arms and shoulders. That is not a reason to avoid the workshop, but it is a good reminder to wear comfortable clothing and arrive ready to work with your hands.
Step Four: Oil for the Final Finish
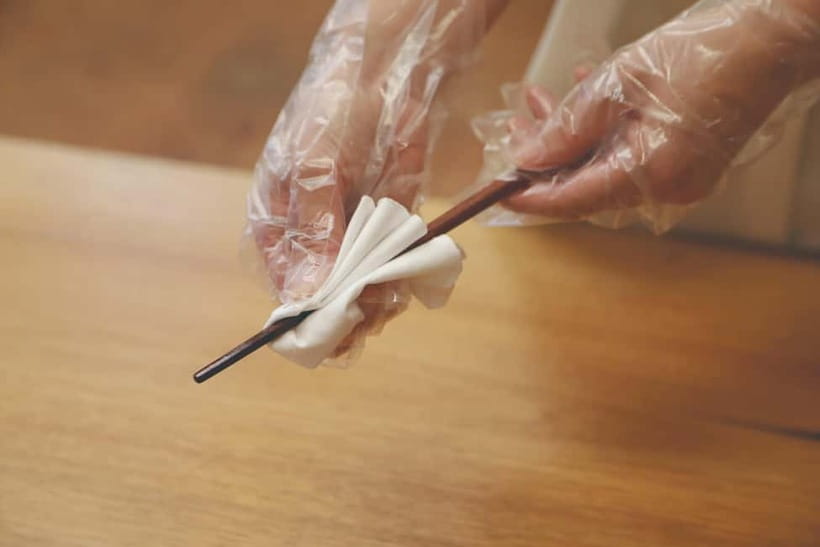
After shaping and sanding, you apply oil to the wood. This brings out the grain and gives the chopsticks a more finished appearance.
The oil is an important final step because it makes the wood look less like a workshop blank and more like a usable household object. It also highlights differences between the wood types. A plain-looking stick can become much more attractive once the grain is brought forward.
You complete the work in the workshop and can take the chopsticks home that day. That immediate finish is convenient if you are near the end of your Japan trip or do not want to arrange shipping.
The finished pair is not just a display item. The strongest value here comes from combining a personal memory with something you can use for meals at home. Every time you reach for the chopsticks, you have a reminder of your time in Tokyo that takes up almost no luggage space.
A few more Tokyo tours and experiences worth a look

Optional Engraving in Japanese or Your Own Language
For an additional ¥1,100 per pair, you can have a name or favorite phrase engraved. The engraving can be written in Japanese or in your native language.
The workshop uses a high-performance laser designed to put gentle stress on the wood. This gives you a cleaner personal mark than a rough hand-scratched inscription. Staff can also help translate a name or phrase into Japanese if you want a more local touch.
Engraving is especially useful if you are making chopsticks for a child, partner, parent, or family member. It turns two similar handmade objects into clearly personal gifts.
The charge is per pair, so check the total if several people in your group want engraving. For a single pair, ¥1,100 is a reasonable addition if you care about the keepsake aspect. If you are trying to keep the activity strictly to $25, skip it and let the wood itself carry the memory.
What the $25 Price Really Includes
The listed price is $25 per person. It includes the workshop, tools, materials, your own handmade chopsticks, access to the included wood choices, and English-speaking assistance. The ¥1,000 guide fee is already included in the experience price.
The value is good if you want an activity rather than a cheap pair of chopsticks. You can buy chopsticks for less in Tokyo, but those will not carry the memory of choosing the wood and shaping them yourself. The price also covers instruction and the use of woodworking tools in a central Ginza location.
The final cost needs a little care. The base price includes five wood options, while 19 higher-grade choices cost extra. Engraving adds ¥1,100 per pair, and making a second pair also requires an additional payment.
I would decide your budget before arriving. If you want the simplest version, choose one of the included woods and skip engraving. If you are creating a special gift, the upgrade may be worth it, but ask about the surcharge before you commit to a premium wood.
With a rating of 4.8 from 1,366 reviews, the activity has a strong record of satisfaction. The most consistent strengths are the friendly staff, clear instruction, satisfying hands-on work, and the quality of the finished souvenir. The most useful cautions are the arm effort, the extra charges, and the possibility of a crowded workshop.
Families, Teenagers, and Older Participants
This workshop works well for couples, families, and older children who can follow instructions and handle a hand tool. Children aged 10 to 12 have enjoyed it, and teenagers have found the process rewarding. The one-hour format is also manageable for a birthday activity or a break in a busy Tokyo day.
The stated age restrictions say the activity is not suitable for children under 3 or people over 70. The physical effort explains why you should take that seriously, even though one family reported enjoying it across an age range from 4 to 72.
For younger children, the issue is not only attention span. They need enough strength and coordination to plane the wood safely and accurately. Staff help, but this is not a craft where every step can be done for a small child.
If someone in your group has limited arm strength, you may want to ask the staff for help with the harder wood choices. The workshop is wheelchair accessible, but the available information does not describe the exact workbench arrangement, so contact the provider if you need specific seating or tool-access details.
Timing, Cancellation, and Practical Details
The activity lasts about one hour, with starting times based on availability. That makes it easy to place before lunch, after shopping, or during a rainy afternoon in Ginza.
Arrive at the correct address, since one participant initially went to the wrong location. The meeting point is 2-9-13 Ginza, Chuo-ku, Tokyo. If you arrive early, the staff may be able to begin promptly when space and preparation allow, but your scheduled time remains the safest plan.
English and Japanese are available. The staff work with several people at different stages, so you may need to wait briefly for help during a busy session. The instruction is beginner-friendly, but you should be willing to listen, repeat the motion, and ask for correction.
You can cancel up to 24 hours in advance for a full refund. The reserve-now-and-pay-later option lets you hold a place without paying immediately, which is useful when your Tokyo schedule is still changing.
How This Compares With Buying Chopsticks
A shop-bought pair is faster, cheaper, and often more perfectly finished. This workshop is not the right choice if you simply need dining utensils.
The value comes from the process. You select the material, feel the resistance of the wood, make small decisions about shape, and finish the pair yourself. Tiny imperfections become part of the object rather than flaws to hide.
That makes the workshop a strong choice for a meaningful souvenir. It also works well for a family activity because each person can choose a different wood and length. Add engraving, and the pair becomes a personal gift rather than a generic Tokyo purchase.
I would not choose an expensive specialty wood solely because it sounds impressive. A beginner-friendly included wood may give you a smoother first experience. Upgrade when the grain, color, or gift value matters more than ease.
Should You Book the Ginza Chopstick Workshop?
Book it if you want a short, useful craft experience with patient English support and a souvenir you can use at home. It suits couples, families with older children, teenagers, and anyone who enjoys working with their hands.
Choose it with open eyes. Planing takes strength, sanding takes patience, and the most attractive woods may cost extra. Engraving is optional, but it adds a thoughtful finish for gifts and family keepsakes.
For a one-hour Ginza activity, the base price offers solid value. I would book this over a simple souvenir purchase if you want to remember Tokyo through something you made yourself. Pick the included wood for the best price, choose a premium wood only after checking the surcharge, and leave enough time to sand carefully.
FAQ
Where is the chopstick-making workshop located?
The meeting point is 2-9-13 Ginza, Chuo-ku, Tokyo, in the Ginza district of Tokyo.
How long does the workshop take?
The stated duration is one hour. Some participants finish in about that time, while others may spend longer if they work very carefully or make an additional pair.
What does the $25 price include?
The price includes the chopstick-making workshop, tools and materials, your handmade chopsticks, the included wood choices, and English-speaking staff assistance. The ¥1,000 guide fee is included.
How many types of wood can I choose from?
You can choose from 24 types of wood and two lengths. Five wood types are included in the base price, while 19 higher-grade options require an additional charge.
Does engraving cost extra?
Yes. Name or phrase engraving costs an additional ¥1,100 per pair. You can request engraving in Japanese or your native language.
Can I take the chopsticks home the same day?
Yes. You can take your completed chopsticks home on the day of the workshop.
Is English instruction available?
Yes. Staff and instructors provide assistance in English and Japanese. The activity is suitable for beginners, with step-by-step guidance.
Who should not take this activity?
The activity is listed as unsuitable for children under 3 and people over 70. It also requires some arm strength because you shape the wood with a hand plane.
More Workshops & Classes in Tokyo

More Craft Workshops in Tokyo
More Ginza Tours in Tokyo


More tours in Tokyo we've reviewed







Ginza Tours, compared.
 ★ 4.5Tokyo: Art Aquarium Museum GINZA Entry TicketFrom $171 day
 ★ 4.5Official Japan Go-Kart Through Tokyo Bay / Ginza (IDP Required)From $85
 ★ 5.0Private Ginza Architecture Walking TourFrom $132
 ★ 4.5【SUMO FESTIVAL】Tokyo Ginza: Sumo Show & Photo ExperienceFrom $63
 ★ 4.8Tokyo GINZA: KONPARU Japanese Cabaret Show with DrinkFrom $502 hours
 ★ 4.9Tokyo: Discover the Art of Kintsugi in GinzaFrom $751h 30m