
Reviewed · CRAFT WORKSHOPS
Calligraphy & print your calligraphy on a T-shirt.
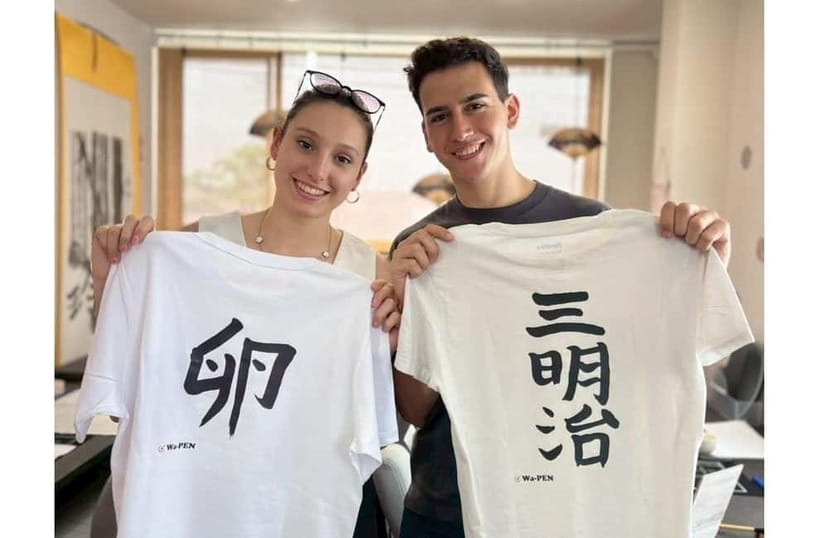
The best part of this Japanese calligraphy class is that you do not simply copy a character and leave with a sheet of paper. You learn how the writing works, make Sumi ink from an ink stick, practice with a brush, and then put your favorite design on a T-shirt you can wear or pack home.
I like the calm pace and the personal touch from instructor Mana, who gives beginners time to practice and useful pointers. I also like the small details: green tea while you write a postcard, plus the chance to choose exactly where your design goes on the shirt. The one thing to consider is that ink can stain, so wear clothes you do not mind marking.
In This Review
- Key points at a glance
- What makes this calligraphy class worth your time
- Finding the red-brick meeting point
- First, learn what Japanese characters mean
- Grinding Sumi ink the traditional way
- Thirty minutes of brush practice
- Choosing a design for your T-shirt
- Green tea, a postcard, and a few quiet minutes
- Waiting ten minutes for the finished shirt
- What the $48 price includes
- Who will enjoy it most
- Planning the class around Asakusa
- Should you book this calligraphy experience?
- FAQ
- Where does the calligraphy activity take place?
- How long does the class last?
- Is the class taught in English?
- Who teaches the class?
- Do I need previous calligraphy experience?
- What materials are included?
- Is a T-shirt included?
- Can I take the finished shirt home the same day?
- What should I wear?
Key points at a glance
- Make your own Sumi ink: Grind an ink stick with water on a traditional inkstone before you begin writing.
- Practice for about 30 minutes: Use thin paper, a Fude brush, and guidance from an English-speaking instructor.
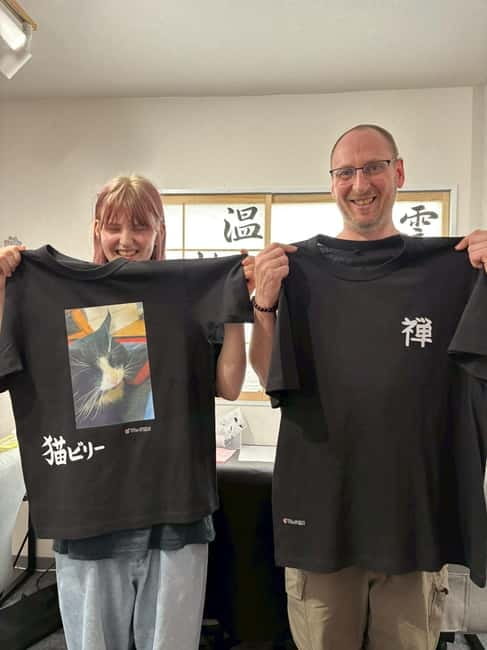
- Turn practice into a wearable souvenir: Pick a design and choose where it will be printed on your T-shirt.
- Enjoy a quiet cultural break: Green tea and a postcard add a slower, more personal part to the lesson.
- Allow 60 to 90 minutes: Your printed clothing should be ready after about 10 minutes.
- Good for families and first-timers: Mana has worked patiently with children aged 10 and 14, as well as adults with no calligraphy background.
What makes this calligraphy class worth your time
Many Japan souvenirs are bought ready-made. This activity gives you a hand in making one. You learn a little about Japanese characters and culture, try the tools yourself, and finish with clothing marked by a design you selected and practiced.
That makes the $48 price easier to assess. You are paying for instruction, materials, a T-shirt, green tea, a postcard, and the printing service. It is not the cheapest souvenir in Japan, but it offers more than a standard craft workshop because the final item is useful and personal.
I would not book this class only to produce perfect calligraphy. Beginners spend much of the session learning how to hold and guide the brush. The appeal is the process, the chance to make something with your hands, and the story attached to the shirt afterward.
The class is taught in English, which helps when you are learning unfamiliar terms and techniques. Mana’s teaching style is patient and generous with practice time. That matters because Japanese calligraphy can look simple until you try to control the brush yourself.
A few more Tokyo tours and experiences worth a look

Finding the red-brick meeting point
The meeting place is inside a red-brick building on the third floor. Look for a sign on the first floor. A restaurant occupies the ground floor, and you should use the stairs to the right of the restaurant.
Arrive 10 minutes early. This gives you time to find the building, go upstairs, and get settled before the writing starts. The directions are specific, but the building has a working restaurant at street level, so do not assume the class entrance will look like a separate shop.
The exact starting time depends on availability when you book. The class itself lasts between one hour and 90 minutes, depending on the pace and the printing stage. Plan a little space around it rather than scheduling a hurried appointment immediately afterward.
The class is on Honshu, and one useful plan is to arrange it in the morning and use the shirt-printing wait as a short break before exploring Asakusa. The printing takes about 10 minutes, but timing can still vary with the class flow, so keep your schedule flexible.
First, learn what Japanese characters mean
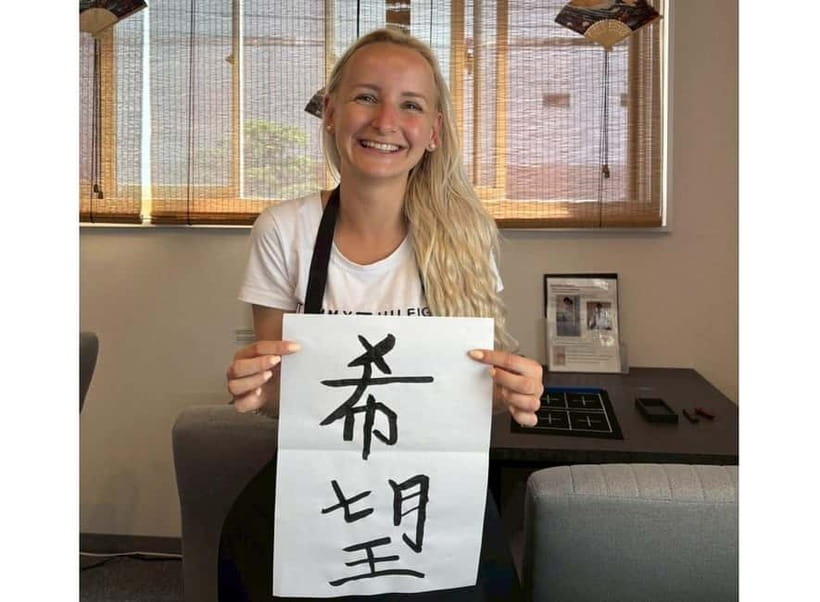
The session begins with an introduction to the history of Japanese characters and their place in Japanese culture. This gives the brush work some context. You are not just tracing attractive marks without knowing that the forms belong to a larger writing tradition.
The instructor then explains how to use the Fude, the Japanese writing brush described for this class, along with traditional ink. Expect guidance on the basic handling of the brush and on how to approach the character designs provided for the activity.
This opening section is especially useful if you have never tried calligraphy. Japanese writing can seem mysterious when viewed on signs, menus, or souvenirs. A short explanation helps you see the character as a deliberate form rather than a random collection of lines.
The cultural introduction is not presented as a long lecture. It leads into practice fairly quickly, which suits a one-hour to 90-minute activity. If you want a full academic lesson on Japanese writing systems, this is not that. If you want enough context to make your craft meaningful, it fills that role well.
Grinding Sumi ink the traditional way
One of the more distinctive parts is making your own ink. You add water and use a Sumi ink stick on an inkstone, working the stick until the ink is ready for writing.
This step slows the class down in a good way. You begin to understand that calligraphy is not simply grabbing a marker and drawing symbols. The ink, brush, paper, pressure, and movement all affect the result.
You also use the supporting tools supplied for the session:
- Fude brush
- Paper
- Ink stick and inkstone
- Paper stopper
- Under pad
The paper stopper and under pad are practical items for a beginner. They help keep the paper in place and protect the working surface while you concentrate on brush control. Ink work can be messy, which is another reason to wear comfortable clothes that you do not mind getting stained.
You do not need to bring writing supplies. All necessary materials are included, and the instructor shows you how to use them. That makes this an easy activity to add during a Japan trip, especially if you do not want to buy a full set of calligraphy tools.
Thirty minutes of brush practice
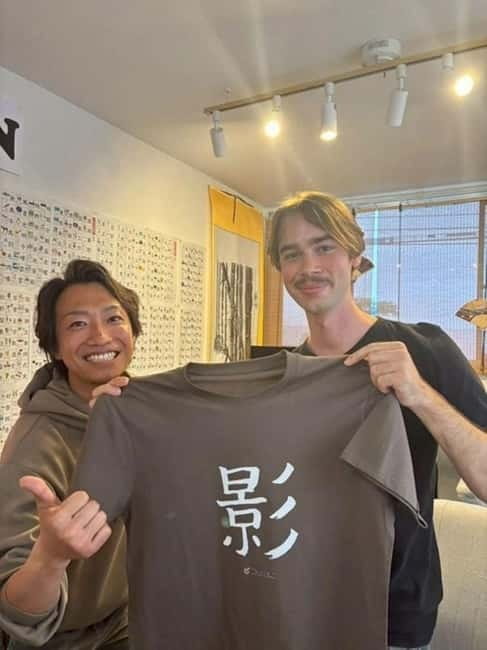
The main practice period lasts about 30 minutes and takes place on thin paper. Mana demonstrates the technique, then gives you time to try the characters yourself.
This is where the class earns its value for beginners. You can make several attempts rather than being pushed straight toward the final T-shirt design. One participant especially appreciated copying kanji stencils during this first stage, which is a useful way to learn the order and shape of the strokes without feeling lost.
Expect your first brush marks to look uneven. That is normal. The aim is not to produce museum-quality calligraphy in one sitting. You are learning how much ink the brush holds, how firmly to press, and how a slow or quick movement changes the stroke.
Mana has been praised for giving students plenty of time and individual pointers. That is important in a hands-on lesson, since a short group demonstration cannot correct every person’s grip or brush movement. The class is not described as private, but one family happened to be the only group in its session and found the experience especially personal.
If you are traveling with children, this practice period gives them something active to do. The class worked well for children aged 10 and 14, with patient instruction that kept both involved. Younger children may need help staying focused around ink and thin paper, but the basic format is approachable.




Choosing a design for your T-shirt
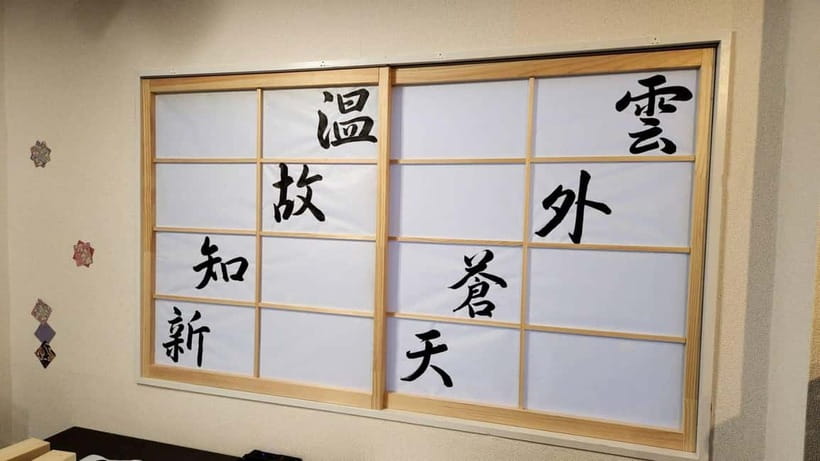
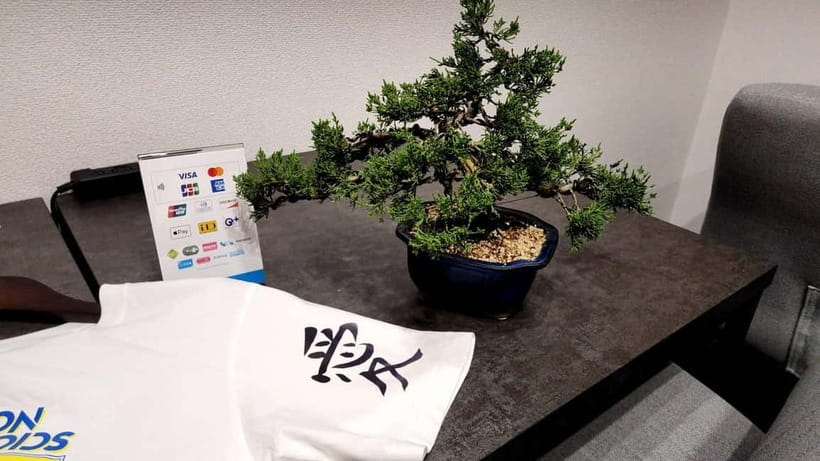
After practicing, you choose your favorite design and decide where it should go on the clothing. This choice gives the souvenir a personal angle. You are not simply receiving a shirt with a fixed logo selected by someone else.
Think about placement before the printing begins. A design on the front has a different feel from one placed toward the back or another area of the shirt. The activity information confirms that you can decide where to print, but it does not give a full catalogue of shirt colors, sizes, or design choices, so check the available options when booking or at the class.
T-shirts are included in the price. One participant was also able to print on a shirt brought from home, which suggests that outside clothing may be possible in some cases. Do not assume it is guaranteed for every booking. If you want to use your own shirt, ask the provider in advance.
This part also changes the mood of the session. The early work is about learning and control. The final choice is about style. You get to decide which imperfect but meaningful design deserves a place on something you will actually use.
Green tea, a postcard, and a few quiet minutes
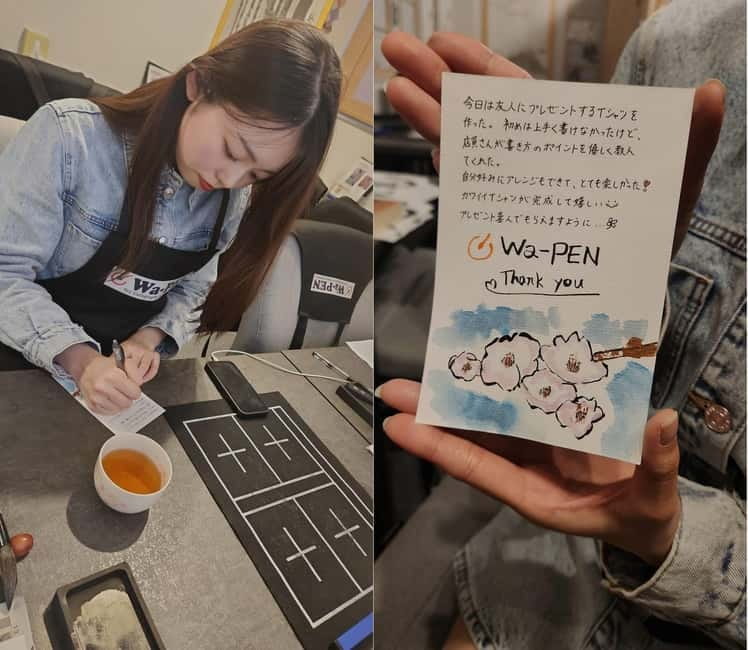
While the shirt is being prepared, you enjoy a cup of green tea and write a postcard. The postcard is included, and you can take it home as another souvenir.
I like this pause because it prevents the class from feeling like a production line. You have time to look at your calligraphy, think about the character you chose, and write a short note while the clothing is finished.
The postcard also gives you a second way to keep the memory. The T-shirt may be useful, but it can eventually wear out or stay in a drawer. A postcard takes up almost no room in your luggage and preserves the date and feeling of the activity.
The tea is a small serving, not a separate tea ceremony. It should be viewed as a pleasant part of the workshop rather than the main attraction. If you are looking for a formal tea experience, book one separately. Here, the tea simply gives you a calm interlude while the practical work continues.
Waiting ten minutes for the finished shirt
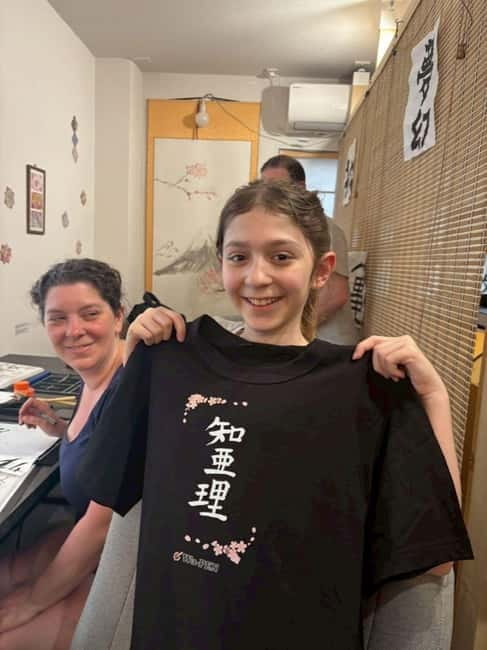
The custom design is expected to be ready after about 10 minutes. Once it is printed, you can take the clothing home.
That short wait is useful when planning the rest of your day. You may be able to make a nearby plan, but stay close enough to collect the shirt unless Mana or the provider gives you different instructions. One family received personal delivery of its finished creations, but that was a special kindness and should not be treated as a standard service.
The shirt is a light souvenir compared with pottery, framed art, or larger crafts. It folds easily into luggage, though you should protect it from rubbing against damp items or anything that could transfer color before you wash it.
The final object is not likely to look identical to a professional calligrapher’s work. That is part of its charm. It carries evidence of your attempts and the instruction you received. If you want a flawless printed design, a shop-bought shirt may suit you better. If you want a wearable reminder that you made the marks yourself, this format is stronger.
What the $48 price includes
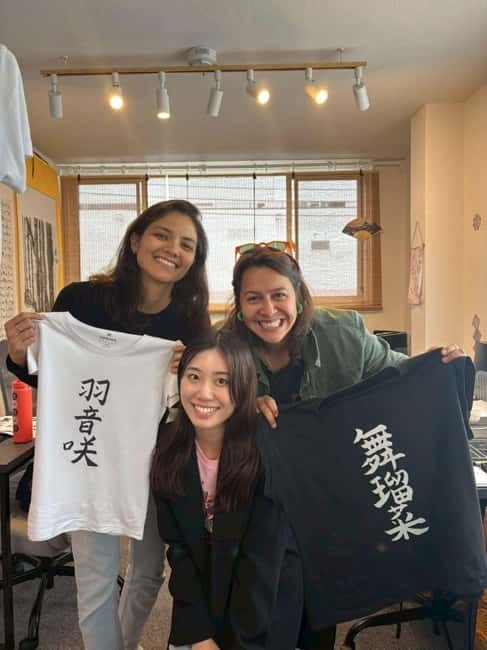
At $48 per person, the activity sits in the middle range for a short cultural workshop. The value comes from the combination of several parts:
- English-language instruction
- Historical and cultural explanation
- Brush, paper, ink, inkstone, and other tools
- Practice time with an instructor
- Green tea
- Postcard
- T-shirt
- Printing of your chosen design
You are also paying for the instructor’s attention and for the chance to work with traditional materials. Buying a shirt alone would cost less, but it would not include the making process or the lesson.
For a family, the cost can add up quickly, so consider whether each person will enjoy the practice stage rather than only wanting the finished shirt. For couples, solo visitors, and adults interested in Japanese culture, the price is easier to justify because the class provides both an activity and a practical souvenir.
The provider offers free cancellation up to 24 hours before the start time, and you can reserve now and pay later. Those terms are useful if your Honshu plans are still moving around, but check the conditions shown for your selected time when you book.
Who will enjoy it most
I would recommend this for first-time calligraphy students, families with older children, and anyone who prefers a hands-on cultural activity to a guided sightseeing stop. You do not need previous experience or your own equipment.
It is also a good choice if your suitcase has room for a light T-shirt and postcard but not for a fragile craft. The finished design gives you something more distinctive than a generic souvenir, even if the brushwork is not perfect.
This may be less suitable if you dislike crafts, have very little patience for practice, or need a tightly timed itinerary. The class is relaxed by design. You spend time learning before you reach the printing stage.
I would also think about your clothing. Ink is part of the activity, and the instructions specifically advise wearing clothes you do not mind getting ink on. Comfortable clothes are best.
Planning the class around Asakusa
The activity can fit neatly into a morning in Asakusa. Book an available early time, attend the writing session, collect your T-shirt, and then continue sightseeing with a new souvenir in your bag.
The location details provided for the building are more useful than a vague landmark: red brick, third floor, sign on the first floor, stairs to the right of the restaurant. Save those instructions before leaving your hotel, and arrive early enough to avoid searching with a wet brush appointment on your mind.
The class lasts only 60 to 90 minutes, so it does not consume an entire day. At the same time, I would not treat it as a five-minute photo stop. The best part is the practice, and rushing through that stage would miss the point.
Should you book this calligraphy experience?
Book it if you want a calm, creative activity with a real souvenir at the end. The strongest reasons are Mana’s patient English instruction, the chance to make Sumi ink, the 30-minute practice period, and the choice of design and shirt placement.
The class is particularly good for families and beginners. It also suits repeat visitors to Japan who want something more personal than another temple visit or shopping stop. One participant who had already visited Japan three times called it one of the best experiences of that trip, which fits the activity’s appeal: it gives you a skill, a story, and a shirt connected to your own hand.
Skip it if your main goal is polished professional calligraphy or if you cannot spare 60 to 90 minutes for a slow craft. At $48, the value depends on caring about the process as much as the finished T-shirt.
FAQ
Where does the calligraphy activity take place?
It takes place in a red-brick building on the third floor on Honshu, Japan. There is a sign on the first floor, and the entrance stairs are to the right of the restaurant on the ground floor.
How long does the class last?
The activity lasts between one hour and 90 minutes. Check the available starting times when booking.
Is the class taught in English?
Yes. The instructor teaches in English, and English-language guidance is included.
Who teaches the class?
The instructor is Mana. She teaches the writing techniques, explains Japanese characters and culture, and helps you practice.
Do I need previous calligraphy experience?
No previous experience is required. The class includes instruction, practice with thin paper, and guidance on using the Fude brush and traditional ink.
What materials are included?
The class includes a pen or Fude brush, paper, ink, an inkstone, a paper stopper, and an under pad. Expert instruction is also included.
Is a T-shirt included?
Yes. A T-shirt is included, and you choose your preferred design and where to print it. One participant also printed a design on a shirt brought from home, but ask ahead if you want to use your own clothing.
Can I take the finished shirt home the same day?
Yes. The custom clothing is expected to be ready after about 10 minutes and can be taken home as a souvenir.
What should I wear?
Wear comfortable clothes that you do not mind getting ink on. The activity instructions specifically advise against wearing clothing you want to keep spotless.
More Craft Workshops in Tokyo

More tours in Tokyo we've reviewed









Craft Workshops, compared.
 ★ 5.0Tokyo Shinjuku Chopsticks Making ClassFrom $20
 ★ 4.8Chopstick Making Workshop in GinzaFrom $251 hour
 ★ 5.0Kintsugi Experience: Art of Golden Joinery in TokyoFrom $59
 ★ 5.0Tokyo Chopstick Making Workshop with ArtisanFrom $26
Tokyo: Shinjuku Chopstick Making ClassFrom $121 hour
Tokyo: Chopstick-Making WorkshopFrom $61 hour
★ 5.0Tokyo Chopstick Making Workshop with ArtisanFrom $26
Tokyo: Shinjuku Chopstick Making ClassFrom $121 hour
Tokyo: Chopstick-Making WorkshopFrom $61 hour