
Reviewed · AKIHABARA & ANIME TOURS
Tokyo: Gameboy Mod Workshop at Akihabara
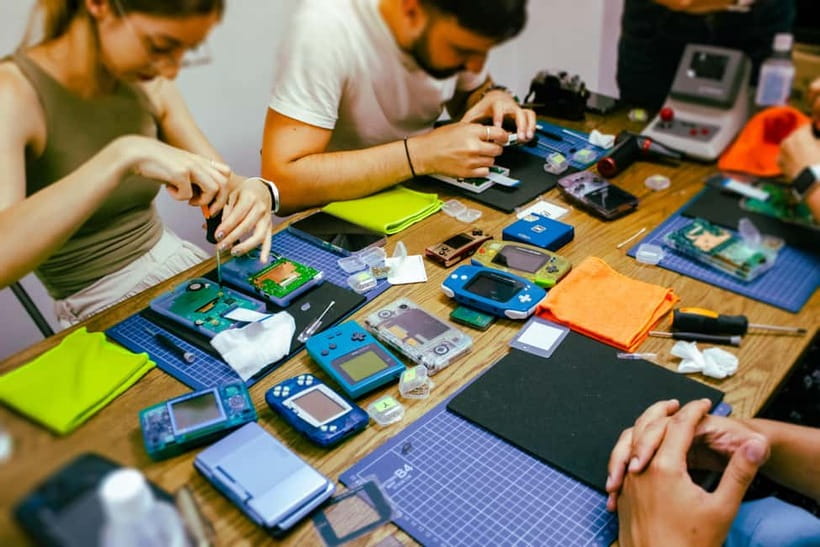
A two-hour workshop in Akihabara lets you take apart and rebuild a classic DMG-01 Game Boy, then leave Tokyo with a working console that reflects your own color choices. You pick the shell, buttons, parts, and screen, with multilingual guidance from staff such as Gabi, Franz, Shio-san, and Ro.
I especially like the small group of up to four and the hands-on format. You also get a short lesson on Nintendo’s handheld consoles, access to many customization choices, and a chance to buy games afterward. The main caution is price: at $360 per person, this is a major splurge for a two-hour activity.
In This Review
- Quick points to know
- Why this Akihabara workshop feels different
- Starting with Game Boy history and old hardware
- Choosing your shell, buttons, and screen
- Taking apart the original Game Boy
- Rebuilding a playable custom console
- Picking up games after the build
- What the $360 price really covers
- Who will enjoy the two-hour session most
- Group size, location, and practical details
- Why this can be one of your best Tokyo souvenirs
- Should you book the Game Boy Mod Workshop?
- FAQ
- Where is the Game Boy Mod Workshop held?
- How long does the workshop last?
- How many people can join the workshop?
- Is the workshop offered in English?
- What Game Boy model do you build?
- What can I customize?
- Is the workshop wheelchair accessible?
Quick points to know
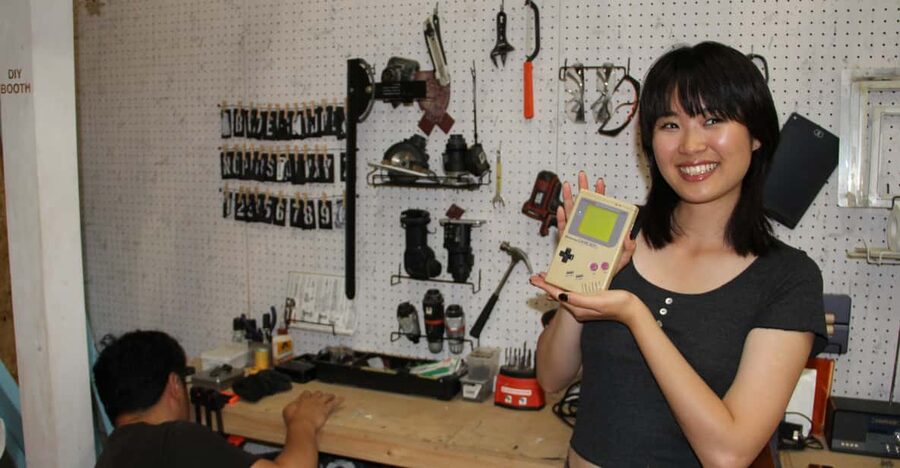
- You build a real DMG-01 Game Boy: Take apart the original hardware, reuse key components, and rebuild it with selected new parts.
- Your color choices matter: Pick the shell, buttons, screen surround, power control, and other available details.
- The group is capped at four: That gives you close help when small screws, cables, or unfamiliar electronics cause trouble.
- The workshop includes a handheld gaming lesson: You handle examples of Nintendo’s portable consoles while learning how the Game Boy developed.
- You can add games in Akihabara: A game is included at a set value, and extra Japanese and international titles are available to buy.
- The finished console is tested before you leave: You take home a playable keepsake, not a half-finished electronics project.
Why this Akihabara workshop feels different
Akihabara is full of places to buy games, figures, and electronics. This activity gives you something the shops cannot: a role in making your own retro console.
The appeal is not just nostalgia. You are handling a machine that helped define portable gaming, learning how its parts fit together, and making choices that turn a familiar gray or colored Game Boy into your own version. You do not need to arrive as an electronics expert. The staff guide beginners carefully, while experienced players can ask more technical questions.
The workshop is run by people who clearly care about handheld gaming. That enthusiasm shapes the mood. The lesson is not a dry lecture, and the building session is not a silent repair class. You learn, make decisions, ask questions, and work with the staff as the console takes shape.
For a family, couple, or solo visitor, this creates a shared activity with a clear result. You do not simply take photos and move on. You carry a working object home, along with the memory of building it in Tokyo.
A few more Tokyo tours and experiences worth a look



Starting with Game Boy history and old hardware
The session begins with an introduction to the Game Boy and the wider story of Nintendo’s handheld consoles. The staff show examples from the company’s portable gaming line, giving you a chance to see and handle different machines rather than only hearing about them.
This opening matters because it gives the build some context. The original Game Boy was not simply an old plastic box. Its design, screen, controls, and game format shaped portable gaming for years. Seeing related consoles helps you understand what changed over time and why the original remains so recognizable.
The presentation is useful for both longtime fans and newcomers. If you grew up with a Game Boy, it may bring back memories of playing Tetris, Mario, Kirby, or other favorites. If you did not, you still get a clear introduction before handling the parts.
The staff can also answer questions about the technology and the consoles on display. English and Japanese are available, and the small class size makes it easier to speak up when you want more detail.
Do not expect a museum visit with a long formal program. This is a practical introduction designed to lead into the building work. The best part is the connection between the history lesson and the device you will soon take apart.
Choosing your shell, buttons, and screen
Once the introduction is over, you choose how your Game Boy will look. The available parts let you customize the outer shell, buttons, screen surround, power control, and other visible details.
This is where the activity becomes personal. You can choose a matching color scheme or combine different colors for something less traditional. One participant created a special variant with mixed colors, showing that you are not limited to a single standard design.
You may need time to decide. The selection is extensive enough that a quick choice is not always easy, especially if you have a favorite color combination in mind. I would arrive with a rough idea, but keep your plan flexible until you see the parts in person.
The practical value of this choice is clear: the console becomes a souvenir designed by you, not a mass-produced item selected from a shelf. A Tokyo shopping trip might produce a rare game or character figure, but this gives you a much stronger personal connection to the object.
The choice is not only cosmetic. Reviews describe updated screen technology and improved features, including a backlit screen. The precise options can vary, so ask the staff what is available during your session. The key point is that you are not simply changing the outside. You are creating a more usable version of a classic handheld.
Taking apart the original Game Boy
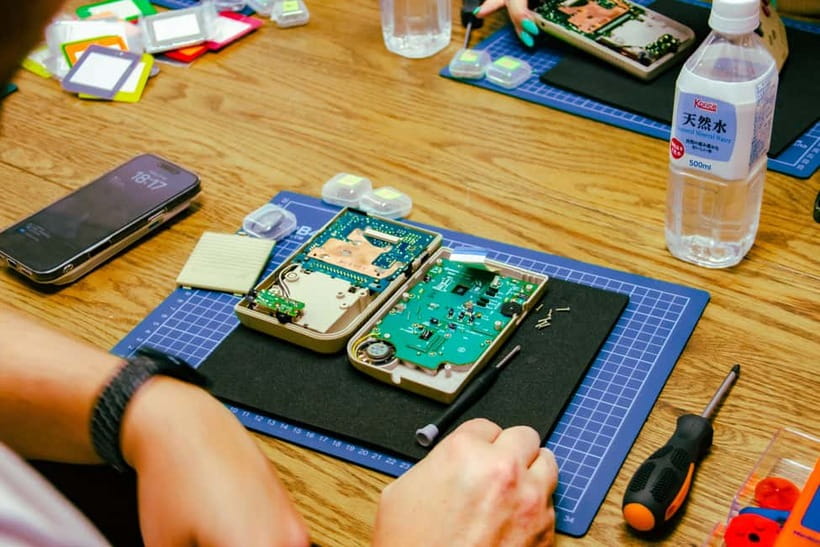
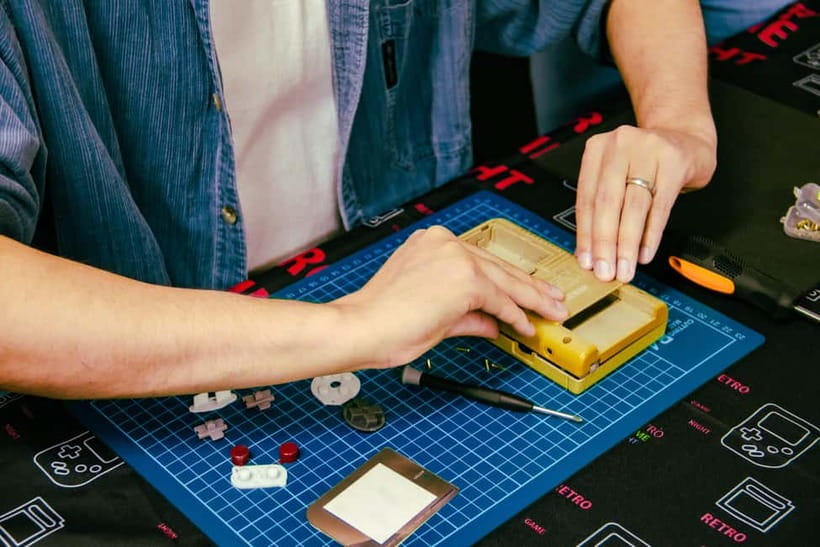
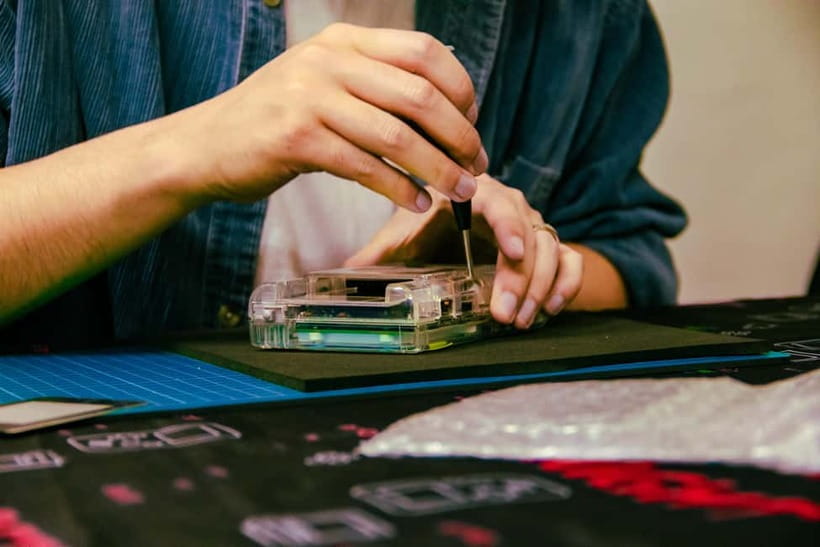
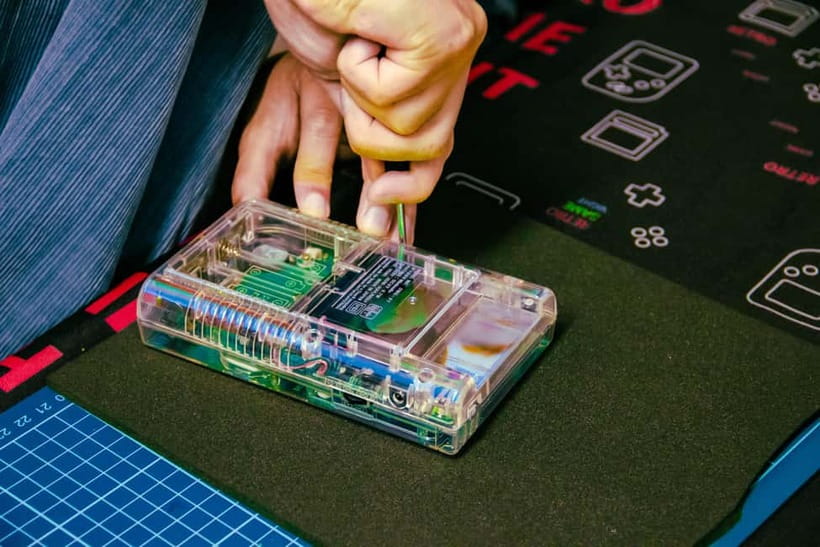
The next stage is the hands-on work. With guidance, you open the Game Boy and separate its components.
For many people, this is the most memorable part. You get to see the inside of a machine that usually stays hidden behind its casing. The staff take you through the process step by step, checking your work and helping quickly if you run into a problem.
There are small parts and careful tasks involved, so this is not the place to rush. The workshop staff are there to keep you moving without taking the job away from you. That balance is important. You do the work, but you are not left alone with a pile of screws and a worried expression.
The class size of four makes a real difference here. A large group would make individual help harder, especially when several people reach the same stage at once. In this setting, you can ask for help and receive direct attention.
Parents should note that children can take part, but an adult may want to stay close and help with patience and concentration. The activity has been enjoyed by children around 10 to 14 years old, but the work still involves small components and careful handling.
Rebuilding a playable custom console
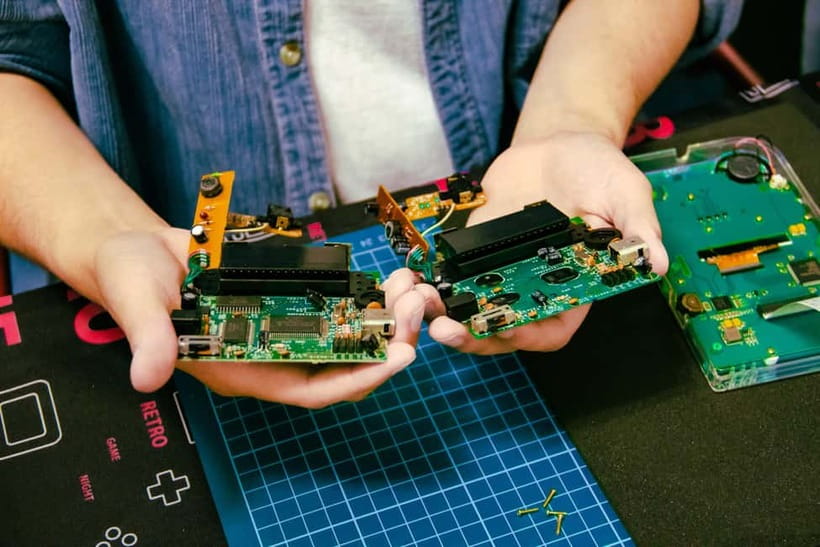
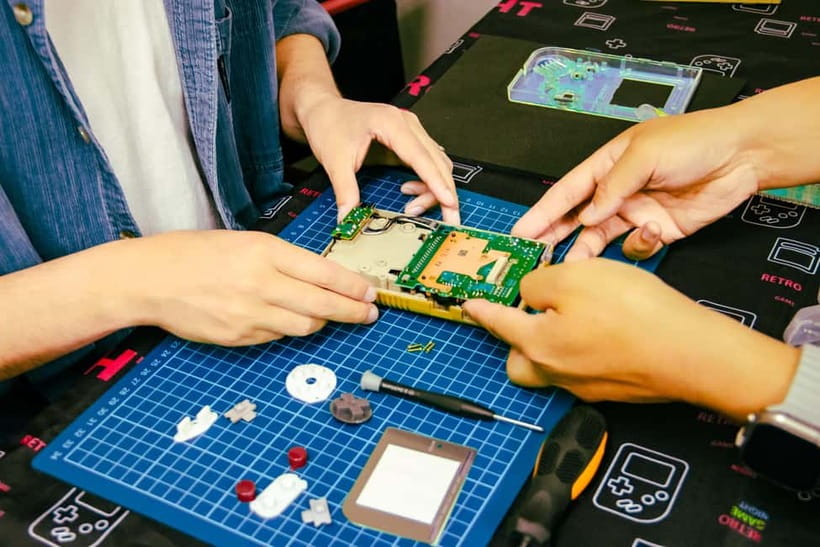
After the original Game Boy is open, you fit the useful hardware into the new setup, add the selected shell and controls, and rebuild the machine.
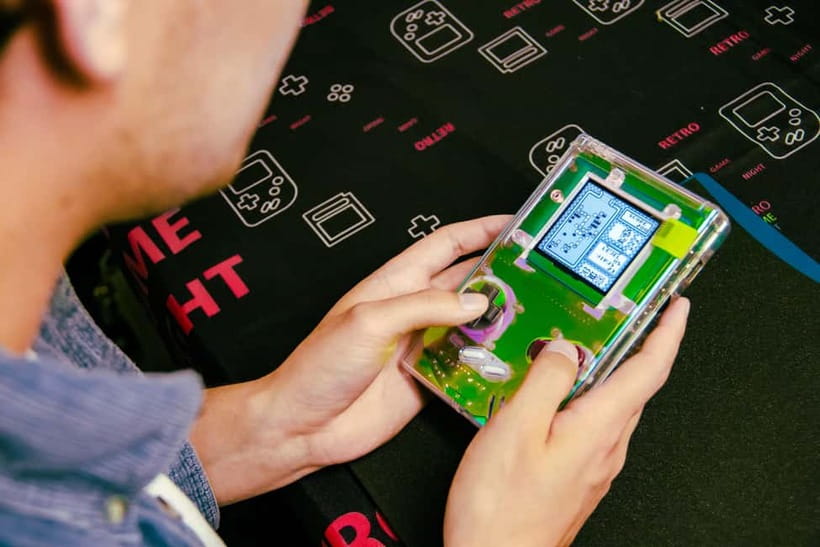
The staff check the console as you go. That reduces the chance of leaving with a device that looks good but does not function. At the end, you test the finished Game Boy and make sure it works before leaving.
This is a satisfying finish because the activity produces something practical. Your console is not just for display. You can play it at home, and several people have gone straight on to buy games in Akihabara so they can start using it.
The improved backlit screen is especially useful. The original Game Boy screen is part of its charm, but it is not known for easy visibility in every setting. An updated screen makes the finished console more convenient for regular play while keeping the familiar shape and controls.
The exact technical work is handled with staff support, so you do not need soldering experience or a background in electronics. That makes this a good choice for a mixed group where one person loves hardware and another simply wants a fun, creative souvenir.
A few more Tokyo tours and experiences worth a look



Picking up games after the build
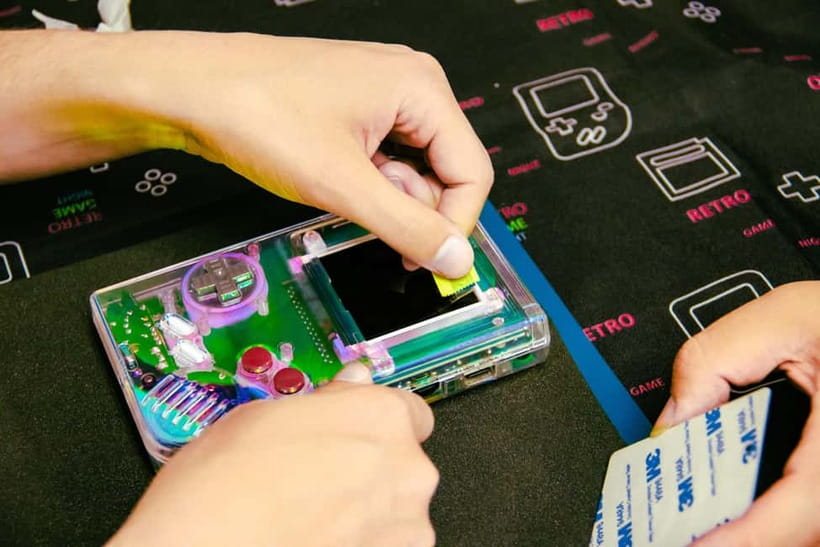
The workshop has a selection of retro games available after the console is completed. A game valued at 1,000 yen is included, and you can purchase additional titles if you find something you want.
The selection includes Japanese and international games, with familiar choices such as Tetris, Mario, Kirby, and Dr. Mario among the kinds of titles available. This is convenient if you do not want to spend another afternoon searching Akihabara shops for a compatible game.
The game prices are also part of the value. Some people found the workshop’s prices lower than comparable titles at other Akihabara stores, including Super Potato. That does not mean every item will be a bargain, but it gives you a useful place to compare before buying.
I would treat the game selection as a welcome extra, not the main reason to book. The heart of the experience is building the console. Still, leaving with a working Game Boy and a suitable game makes the souvenir feel complete.
You may also receive a case for storing or displaying the Game Boy. This is helpful during the rest of your Japan trip and at home, especially if you want to protect the new shell from scratches.
What the $360 price really covers
At $360 per person, this is expensive compared with a shopping trip or a standard sightseeing activity. You should not book it simply because you want to own an old Game Boy. You may find a used original console for much less.
The value comes from the combined package:
- A vintage DMG-01 base console
- New customization parts
- Screen and feature upgrades
- A two-hour guided building session
- A short history of handheld gaming
- Expert help throughout the rebuild
- A game valued at 1,000 yen
- Testing before you leave
- A personal souvenir that you helped create
The workshop also has the difficult job of sourcing enough retro hardware and parts for repeated small-group sessions. That helps explain why the price is higher than the cost of buying a used console from a shop.
Still, the price will feel fair only if you value the activity itself. If you are a Nintendo fan, electronics hobbyist, design-minded shopper, or someone seeking a meaningful gift, the cost may make sense. If you only want inexpensive gaming, it probably will not.
The strongest value comes when two people in a family or couple both enjoy the process. If only one person builds, the other can still join the atmosphere, play games, and learn the history, but the $360 fee remains attached to the participant.
Who will enjoy the two-hour session most
This works best for people who already feel some connection to Game Boy, Nintendo, retro gaming, or hands-on electronics.
You are a good match if you:
- Played Game Boy as a child and want a personal nostalgia piece
- Enjoy taking machines apart and seeing how they work
- Want a creative souvenir rather than another store-bought item
- Like choosing colors and making design decisions
- Are traveling with a gaming partner, family member, or friend
- Want a Tokyo activity that is indoors and focused on a shared project
You do not need technical knowledge. Beginners receive clear instruction, and the staff adjust their help to your level. Experienced players can ask more detailed questions and spend time looking closely at the hardware.
Children can enjoy it too, especially older children who can concentrate on small parts. The activity has worked well for young Nintendo fans, but parents should remember that the workshop involves careful assembly rather than a simple craft project.
For someone with no interest in games or old electronics, the price may be difficult to justify. Akihabara offers plenty of other ways to spend two hours, and this one is tightly focused on the Game Boy.
Group size, location, and practical details
The workshop is on the second floor of the Wakita Building in Akihabara. Follow the provided address carefully, since the meeting point is inside the building rather than a large street-level attraction.
There are no elevators or escalators, so the activity is not wheelchair accessible. Anyone with mobility concerns should take this into account before booking.
The class is limited to four participants. That is one of the most important practical features because the build includes individual choices and hands-on assistance. A small class also makes it easier to talk with the staff and ask questions about Nintendo hardware.
English and Japanese instruction is available. Staff members named in the experience include Gabi, Franz, and Shio-san, while Ro and other Game Boy specialists are also associated with the workshop. The exact staff lineup may vary, but you can expect English and Japanese support.
The session lasts two hours. That is enough time for the introduction, design choices, teardown, rebuild, and testing, but you should not expect a long free-play period afterward. The schedule is focused and purposeful.
You can cancel up to 24 hours before the start time for a full refund, and you can reserve now while paying later. Those options are useful when your Tokyo plans are still shifting.
Why this can be one of your best Tokyo souvenirs
A good souvenir carries a story. This one has several: you chose the colors, handled the parts, learned about the console, and finished the build in Akihabara.
That makes it more personal than a T-shirt or packaged character item. You can also continue using it, which gives the souvenir a life beyond the trip. Each time you play, you will remember the workshop and the choices you made there.
I also like that the activity connects shopping with making. Akihabara is famous for buying games, but this experience asks you to slow down and understand one of the devices behind that culture. You still get time to browse and buy games, but the main focus is your own work.
The staff’s attitude is another major strength. They are patient with first-timers, happy to discuss technical details, and careful about checking the finished device. That combination keeps the session friendly without making it feel shallow.
Should you book the Game Boy Mod Workshop?
Book it if you want a hands-on Tokyo memory, not just a product. The workshop suits Nintendo fans, retro players, families with older children, and anyone who enjoys design or electronics.
I would skip it if $360 feels uncomfortable or if you are mainly looking for a cheap used Game Boy. The fee is high, and the activity lasts only two hours. Its value depends on how much you enjoy the building process and the story behind the machine.
For the right person, this is a rare chance to create a working, customized Game Boy with close help from enthusiastic local specialists. Plan your colors before you arrive, leave room for a few surprises, and make time afterward to browse Akihabara’s game shops. You will leave with a console that is both playable and unmistakably yours.
FAQ
Where is the Game Boy Mod Workshop held?
The workshop is on the second floor of the Wakita Building in Akihabara, Tokyo. Follow the provided address to find the entrance.
How long does the workshop last?
The activity lasts two hours.
How many people can join the workshop?
It is a small-group activity limited to four participants.
Is the workshop offered in English?
Yes. Instruction is available in English and Japanese.
What Game Boy model do you build?
You customize and rebuild a classic DMG-01 Game Boy.
What can I customize?
You can select available colors and parts, including the shell, buttons, screen, screen surround, and power control. The workshop also includes updated screen technology and other modernized features.
Is the workshop wheelchair accessible?
No. The workshop is on the second floor, and the building has no elevator or escalator.
More Workshops & Classes in Tokyo
More Akihabara & Anime Tours in Tokyo

More tours in Tokyo we've reviewed




Akihabara & Anime Tours, compared.
 ★ 5.0Official Street Go-Kart Tour – AkihabaraFrom $61
 ★ 5.0Tokyo Go Kart: Asakusa, Skytree, and Akihabara **IDP MUST**From $99
 ★ 4.7Tokyo: Asakusa, Skytree & Akhihabara Go-Kart City ExperienceFrom $961h 10m
 ★ 4.5Tokyo Studio Ghibli Museum and Ghibli Film Appreciation TourFrom $193
 ★ 5.0Akihabara Anime & Game Adventure Walking Tour (Group or Private)From $90
 ★ 5.0Akihabara Tailor-made Private Tour for Anime FansFrom $132