
Reviewed · PHOTOGRAPHY SESSIONS
Tokyo Cyberpunk Street Photo Tour
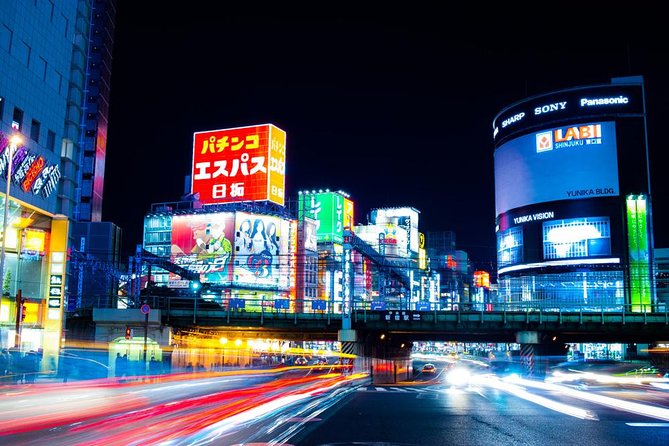
Tokyo looks most like itself after sunset: glowing signs, crowded crossings, narrow alleys, and reflections on wet pavement. This three-hour night photo walk takes you through Shinjuku and Shibuya, finishing at famous Shibuya Crossing, where your guide helps you turn city chaos into usable pictures.
I like two things right away. First, you can join with a proper camera or just a phone. Second, the small group, capped at four people, gives guides such as Charles and Lukasz time to adjust settings, suggest better positions, and help beginners without leaving experienced photographers idle.
The main caution is the pace. Most of the route is on foot through crowded streets, and one participant had trouble keeping up with a fast-moving guide. Shinjuku Station is also huge, so finding the 7 pm meeting point takes care.
In This Review
- Key points at a glance
- What this Tokyo night photo tour is really like
- Kabukicho after dark, Tokyo’s first photo classroom
- Omoide Yokocho, tight frames and warm light
- The train ride from Shinjuku to Shibuya
- Shibuya’s neon streets and youth culture
- Shibuya Crossing, the grand finale
- The teaching style and guide support
- Is $184.99 good value for two people?
- Who should book this experience?
- Practical advice for getting better pictures
- Should you book the Tokyo Cyberpunk Street Photo Tour?
- FAQ
- How long does the Tokyo Cyberpunk Street Photo Tour last?
- What time does the tour start?
- Where does the tour meet?
- Where does the tour finish?
- Can I use a smartphone instead of a camera?
- Is transportation included?
- How many people can join the tour?
- What happens if bad weather cancels the tour?
Key points at a glance
- Neon and long exposures: Practice shutter speed, exposure, and composition around Tokyo’s illuminated streets.
- Three distinctive settings: Shoot Kabukicho, the compact lanes of Omoide Yokocho, and Shibuya Crossing.
- Camera or phone friendly: Guides can offer practical help with iPhones as well as Canon, Fuji, and other cameras.
- Very small group: The maximum is four people, with the price of $184.99 covering up to two participants.
- Train transfer between districts: You move from Shinjuku to Shibuya during the evening, with transport paid separately.
- A lesson as well as a walk: You leave with techniques you can use later, not just a folder of random night snapshots.
What this Tokyo night photo tour is really like
This is not a standard sightseeing walk with a camera occasionally held up for a quick picture. It is a hands-on night photography workshop set in two of Tokyo’s most photogenic districts.
You meet at 7 pm outside the Happy Lemon Keio Shinjuku Shop at 1-chōme-1-4 Nishishinjuku. From there, the instructor leads you into the Shinjuku night scene. The advertised duration is about three hours, while the detailed route describes roughly two and a half hours of active touring. Allow the full evening window, since time is spent stopping, composing, changing settings, and waiting for the right moment.
Your guide may be Charles, Lukasz, Stephane, Luke, Nat, or another EYExplore photographer. The exact instructor matters because the teaching style can vary, but the core service remains the same: help with camera controls, explain why a setting works, and point out strong places to frame the city.
You do not need formal photography training. The instruction suits someone using a phone for holiday memories, while a more practiced photographer can work on long exposure, framing, and night street technique. The best results come if you arrive ready to take advice and try several versions of the same scene.
Other photography tours in Tokyo
Kabukicho after dark, Tokyo’s first photo classroom
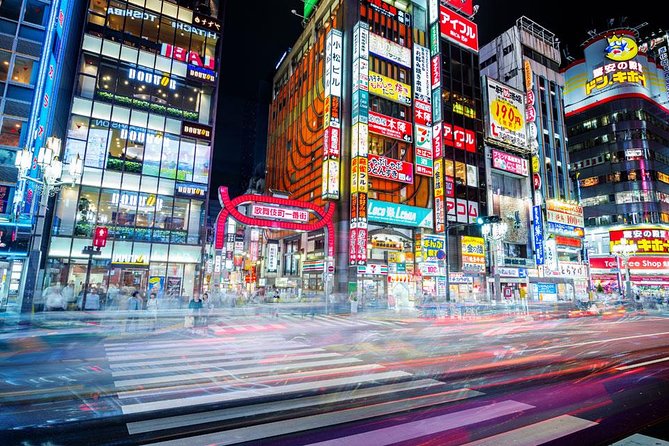
The first major stop is Kabukicho, where you spend about an hour. This is a useful opening section because it gives you plenty of visual material before the tour moves on. Neon signs, traffic, pedestrians, shop fronts, and glowing entertainment venues create layers of light that can be difficult to manage on your own.
Your instructor can help you decide what deserves attention. Instead of photographing every sign in sight, you may work on finding lines, repeating shapes, bright colors, or a person moving through the frame. Night photography quickly exposes weak technique: highlights can blow out, shadows can lose detail, and autofocus may struggle. Direct help with shutter speed and exposure is valuable here.
Kabukicho also introduces the tour’s sightseeing side, though photography remains the clear priority. You receive some local context and see how the district functions at night, but this is not designed as a full cultural or historical explanation of Shinjuku. One piece of direct feedback described the experience as strictly photographic, so book it for pictures first and local storytelling second.
The hour can pass quickly. If you are new to manual controls, ask the guide to explain each adjustment rather than simply changing it for you. Guides such as Charles have been praised for patience and clear instruction, which is especially useful when you want to repeat the process later without help.
Omoide Yokocho, tight frames and warm light
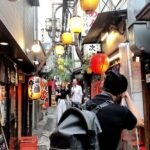
Omoide Yokocho, also known as Memory Lane, receives about 30 minutes. This compact stretch offers a different kind of night scene from Kabukicho. Rather than broad streets and large signs, you work with narrow lanes, small restaurants, warm light, and compressed viewpoints.
The restricted space makes composition easier to understand. You cannot simply step far back and include everything. You need to decide which doorway, sign, person, or overhead detail carries the picture. Your guide may suggest moving a little left or right, waiting for someone to enter the frame, or removing a distracting object from the edge.
This stop is also a good reminder that the most famous view is not always the strongest image. A small detail in a side lane can tell you more about the district than a wide shot of a main road. If you are carrying a larger camera, be considerate in the narrow walkways and keep your equipment under control.
Thirty minutes is enough for a focused session, but not enough for a leisurely exploration of every lane. I would treat Omoide Yokocho as a concentrated composition exercise. Take a few careful images instead of trying to document the whole area.
The train ride from Shinjuku to Shibuya

The route then shifts to Shibuya by train. The transport cost is not included, so carry a little money or a suitable transit method for the journey. The tour ends in Shibuya rather than returning to Shinjuku, which is helpful if you plan to continue your night there.
This transfer is a practical part of the experience, not wasted time. It connects two very different night scenes and lets you reset before the final photo session. Still, keep your group together. Tokyo’s stations are busy, and losing sight of the guide can create a real problem, especially if you are unfamiliar with the area.
The route is not ideal for anyone who dislikes walking through crowds or needs a relaxed pace. Most participants can take part, but the supplied information does not promise a slow walk or a fully step-free route. Wear comfortable shoes and avoid bringing more camera gear than you can carry easily.
Shibuya’s neon streets and youth culture
In Shibuya, you turn your camera toward the district’s glowing signs, entertainment venues, drinking spots, and restaurants. The mood shifts from Shinjuku’s dense back streets to a more open, highly visible stream of people and traffic.
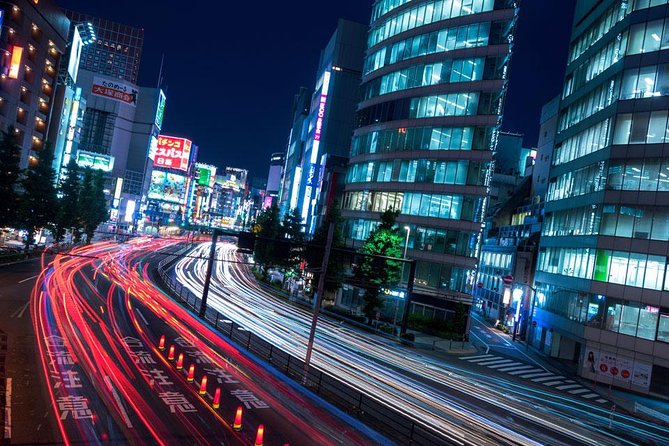
This section is useful for learning how to photograph movement. A slow shutter can stretch headlights and turn walking crowds into flowing shapes. A faster shutter can freeze a single person inside the disorder. Your instructor explains the basic settings and then gives you time to test them, which is more useful than receiving a lecture while standing still.
Phone users should not feel out of place. Several participants used iPhones and received help with contrast, framing, exposure, and the lock function. The point is not to make a phone behave like a professional camera. It is to use the controls your phone already provides more deliberately.
Camera owners should bring equipment with some control over shutter speed or overall exposure. A tripod is suggested for serious long exposures, though the provided information does not say that one is supplied. If you own a small tripod, bring it only if it will not slow you down in crowded areas.
Shibuya Crossing, the grand finale
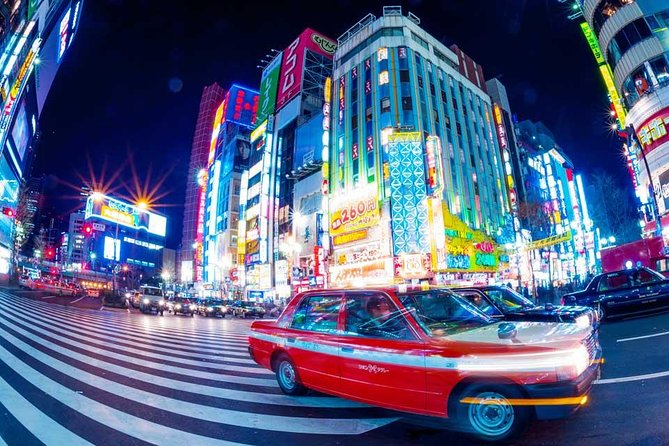
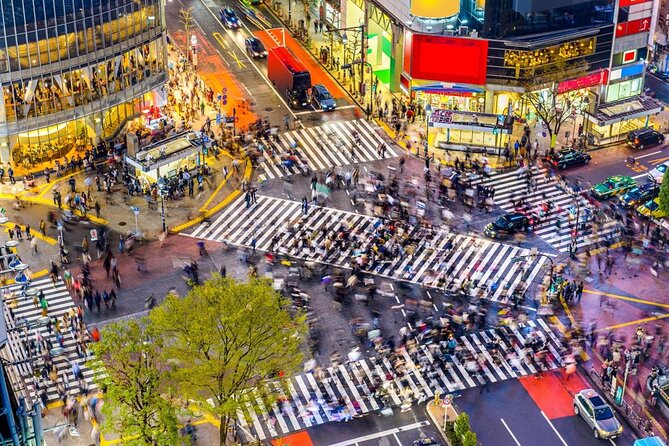
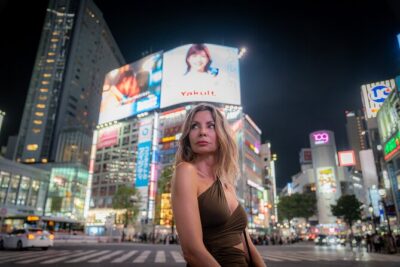
The final stop is Shibuya Crossing, with about 45 minutes set aside for photography. This is the tour’s most recognizable scene and the place where the cyberpunk theme comes closest to the advertising promise.
When the signals change, streams of people cross from several directions beneath giant screens and illuminated signs. The challenge is not finding a subject. It is controlling the amount of information in the frame. Your guide can help you choose a position, wait for the right crossing cycle, and balance the bright screens with the darker street.
Long exposure is a natural fit here. Moving figures can become soft trails while the buildings remain more stable, creating the futuristic look the tour aims for. You can also try shorter exposures to isolate one person or capture the rhythm of the crossing. The best approach depends on your camera, the available light, and how much blur you want.
The crossing is exciting, but it is also crowded. Keep your bag close and do not stop in the middle of pedestrian flow while checking a screen. A guide who stays attentive can make this much easier. Lukasz has been singled out for keeping participants together in large crowds, while other instructors have been praised for scoping out good positions before the group starts shooting.
The tour ends near Shibuya Station at 2-chōme-2-1 Dōgenzaka. You finish with your own photographs rather than a printed product or edited gallery, so remember to back up your images later.
The teaching style and guide support
The strongest part of this activity is the instructor’s one-to-one help. A good night photography lesson is not just a list of settings. It is someone looking at your screen, spotting the problem, and showing you how to correct it.
Charles is repeatedly described as friendly, patient, and technically strong. He has helped participants with both camera settings and phone photography, including long exposure work. Lukasz has been valued for a workshop format: he demonstrates, lets you practice, and then helps you refine the result. Stephane has offered practical ideas about composition and making an image more distinctive.
The instructors also work with different skill levels. Beginners can get help with basic framing, what to leave in or out of the picture, and where to find exposure controls. More experienced photographers can ask about shutter speed, night focus, and reading difficult light. The maximum group size of four makes this kind of personal correction possible.
There is one important variation to keep in mind. At least one participant found the walking pace too fast and eventually lost the guide. If you walk slowly, use a mobility aid, or need regular pauses, tell the operator before booking and confirm that the pace will suit you. Stay alert during transfers and crowded sections.
Is $184.99 good value for two people?
The price is $184.99 per group of up to two, not per person. For a couple or two friends, that works out to about $92.50 each before the train fare. The maximum group size is four, so a larger group may not receive the same small-group pricing structure.
I think the value depends on what you want from the evening. If you only want someone to lead you to Shibuya Crossing, the price is high. You can reach the crossing yourself and take ordinary snapshots without paying for instruction.
If you want a compact photography lesson, the calculation improves. You receive an expert instructor, access to several strong night settings, help with your own equipment, and a prepared route through areas that can be confusing on a first visit. The guide also saves you time by identifying useful shooting positions instead of making you search for them.
For a pair of people who both want to learn, the fee is easier to justify. It is less compelling for someone who already knows night photography and only wants a guided walk. The experience does not include transport, meals, or edited photographs, so factor those limits into your decision.
Who should book this experience?
I would recommend it most strongly to:
- First-time night photographers who want clear help with exposure and shutter speed.
- Phone photographers who want better control over framing, contrast, and low-light settings.
- Couples or friends who can share the group price and want useful photos of their Tokyo trip.
- Visitors arriving early in their stay who want a guided introduction to Shinjuku and Shibuya at night.
- Photographers with a light camera kit who are comfortable walking and changing locations.
It is less suitable if you want a slow cultural tour, detailed neighborhood history, or a food-focused evening. It may also frustrate you if you dislike crowds, need a gentle pace, or prefer to work alone without instruction.
The tour requires good weather. If poor conditions cancel it, you are offered another date or a full refund. The normal cancellation policy is strict, however: once booked, it is non-refundable and cannot be changed for personal reasons.
Practical advice for getting better pictures
Arrive with your camera or phone charged. Night shooting uses power quickly, especially if you review many images or use a bright screen. Bring a spare battery or power bank if you have one, but keep your kit compact.
If you use a camera, learn where to change shutter speed and exposure before meeting the guide. You do not need to master manual photography, but knowing the basic controls will give you more time to shoot. A tripod can help with long exposure, although it may be awkward in tight pedestrian areas.
If you use an iPhone, explore exposure adjustment, focus lock, contrast, and any available night or long exposure functions. The guides can show you where these controls are, but you will get more from the session if you are willing to repeat the steps yourself.
Wear shoes suited to several hours on city streets. Keep passports, wallets, and camera straps secure in crowded areas. Most importantly, stay close to the instructor during station transfers and busy crossings. The route is simple on paper but less simple when thousands of people are moving around you.
Should you book the Tokyo Cyberpunk Street Photo Tour?
Book it if you want a practical photography lesson wrapped around Tokyo’s best-known night streets. The small group, hands-on teaching, and mix of camera and phone support give this experience more purpose than a basic neon walk.
I would especially choose it for a pair of beginners, a serious phone photographer, or anyone carrying a new camera and hoping to use it well in Tokyo. Charles, Lukasz, Stephane, and the other EYExplore guides appear to bring different personalities, but the most useful qualities are patience, technical help, and a willingness to let you practice.
Skip it if your main goal is history, food, or an unhurried stroll. Also think twice if you walk slowly or dislike busy urban crowds. For the right participant, though, this is a smart way to leave Tokyo with better pictures and a few techniques you can keep using long after Shibuya’s signs fade from view.
FAQ
How long does the Tokyo Cyberpunk Street Photo Tour last?
The experience lasts approximately three hours. The detailed route describes about two and a half hours of touring and photography, so you should allow the full advertised time.
What time does the tour start?
The tour starts at 7 pm.
Where does the tour meet?
The meeting point is Happy Lemon Keio Shinjuku Shop at 1-chōme-1-4 Nishishinjuku, Shinjuku City, Tokyo 160-0023, Japan.
Where does the tour finish?
The tour ends at 2-chōme-2-1 Dōgenzaka, Shibuya, Tokyo 150-0043, near Shibuya Station.
Can I use a smartphone instead of a camera?
Yes. The tour supports camera and smartphone photography, and guides have provided tips for iPhone users, including exposure, contrast, framing, and focus lock.
Is transportation included?
No. You travel by train from Shinjuku to Shibuya, and that fare is paid separately.
How many people can join the tour?
The maximum is four participants. The listed price of $184.99 covers a group of up to two people.
What happens if bad weather cancels the tour?
If poor weather causes the experience to be canceled, you are offered a different date or a full refund.
More Photography Tours in Tokyo
More tours in Tokyo we've reviewed

Photography Sessions, compared.
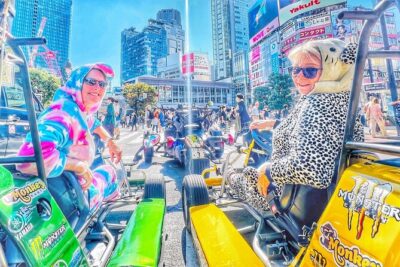 ★ 5.0Best Go Kart Experience in Shibuya Crossing with Iconic PhotosFrom $106
 ★ 4.8Tokyo Go-Karting Experience: Shibuya Crossing with PhotosFrom $901 hour
 ★ 5.0Tokyo by Night Photography Tour (Private Option Available)From $105
 ★ 5.0Tokyo Shinjuku Night Photo Tour with Pro GotaFrom $85
 ★ 5.0Tour with Pro Tokyo Photographer and take Edgy Unique PortraitsFrom $145
 ★ 5.0Tokyo Portrait Tour with a Professional PhotographerFrom $92