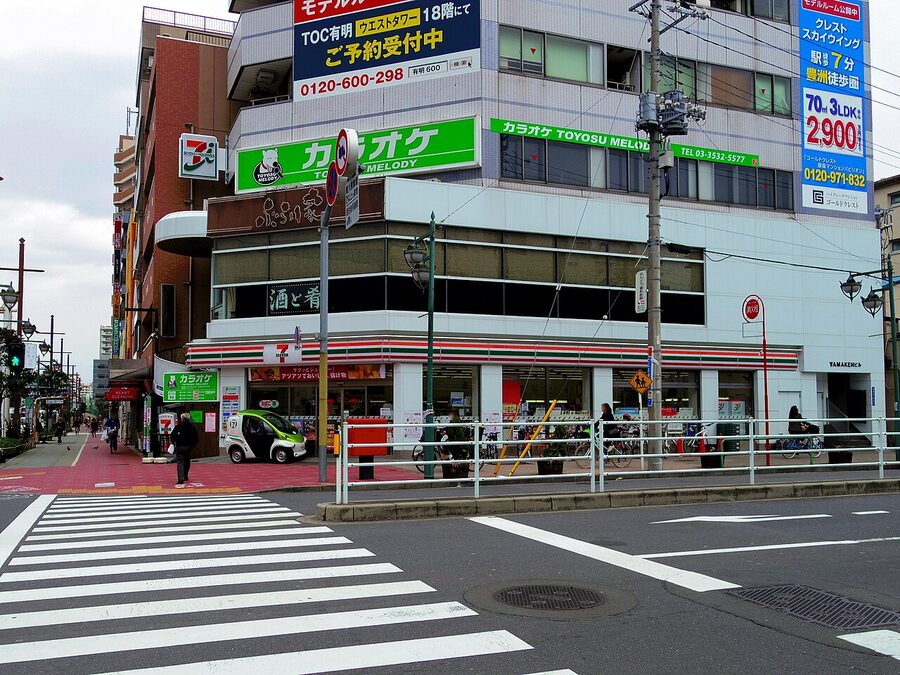
I have been caught cash-only at seven Tokyo restaurants in three years. Three were ramen shops, two were izakayas, one was a tonkatsu counter that had been in the same family for six decades, and one was a sushi place with a black card reader sitting unused on the counter — out of order since 2019, according to the owner. The lesson is not that Japan is cashless. It is that Japan is whatever-the-shop-in-front-of-you-says-it-is, and the sign is usually taped to the till in Japanese only.
So here is a guide I wish someone had emailed me before my first trip. Not the textbook version (yen is the currency, amazing) but the one that covers the ¥220 fee at the 7-Eleven ATM, the specific three-second stare the ramen-shop owner gives you when you realise there’s no card terminal, and whether you should bother exchanging dollars at Narita. I won’t waste your time on history. We’re going to talk about what to actually carry, where to get more of it, and which card goes in which machine.
In This Article
- The one-line answer
- Yen basics: notes and coins
- The ATMs that work for foreign cards
- How to withdraw at a 7-Eleven ATM
- Card acceptance, the real version
- IC cards as a payment tool
- Paying with a Suica at the conbini — three steps
- PayPay and the cashless-Japan reality
- Currency exchange is the last resort
- No tipping, full stop
- The ¥10,000 note myth
- Consumption tax and tax-free shopping
- Wise, Revolut, Schwab — the no-fee-ATM strategies
- How much to actually carry
- Practical info at a glance
- What I’d actually do on day 1
The one-line answer
Carry ¥15,000 to ¥20,000 in cash for your first day. Withdraw from a 7-Eleven ATM, not a currency exchange counter. Use a Suica or Pasmo IC card for everything small. Use a Visa or Mastercard for hotels, chain restaurants, and department stores. Don’t tip. That’s the whole post, basically — but the why-and-how is where the bruises live.
Yen basics: notes and coins
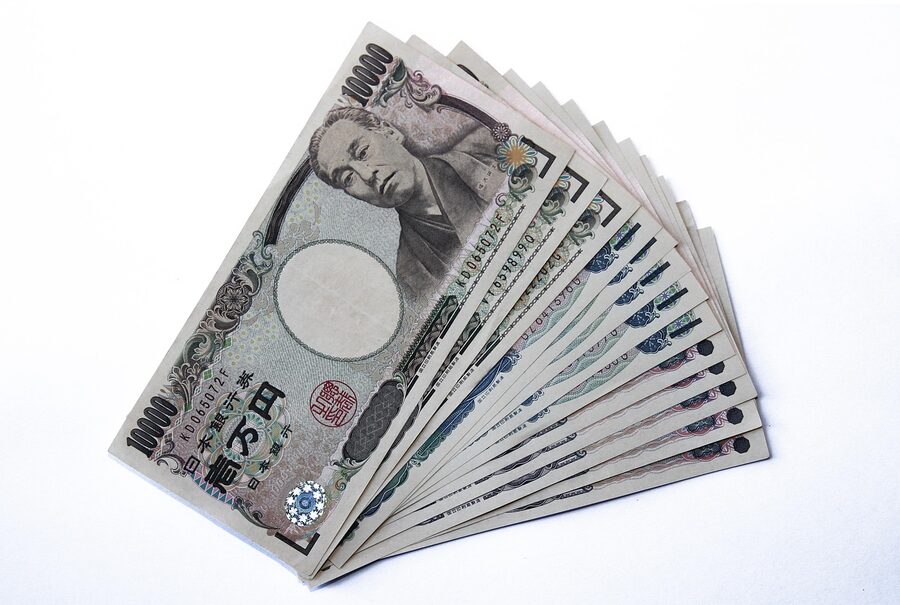
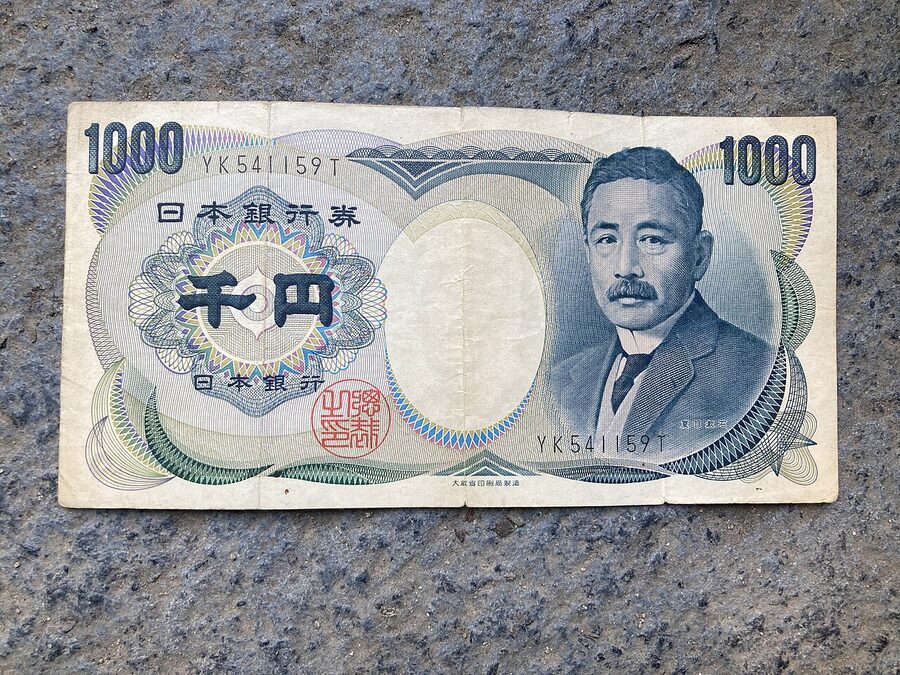
The currency is the Japanese yen, symbol ¥, code JPY. There are four notes you will see daily — ¥1,000, ¥5,000, and ¥10,000 — plus a ¥2,000 note that technically exists but that I have been handed exactly once, as change at a hotel, and I kept it. Most Japanese people under forty have never touched one.
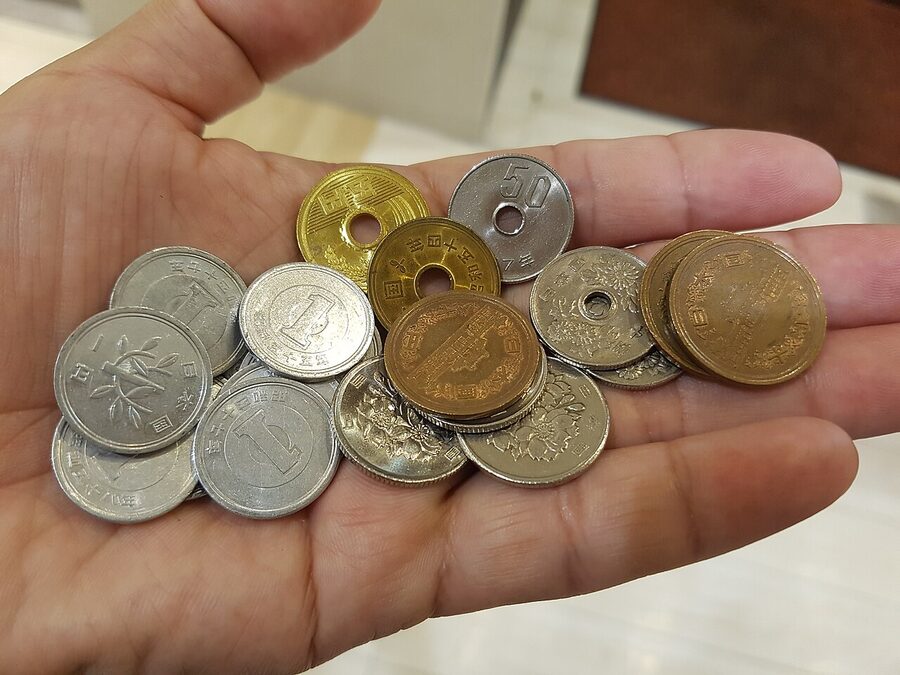
The coins are the bit that tripped me up. There are six: ¥1 (tiny and aluminium, essentially weightless), ¥5 (brass, has a hole through the middle, no Arabic numerals on the face), ¥10 (copper), ¥50 (silver, also holed), ¥100 (silver, no hole), and ¥500 (big bi-metal coin, worth more than most people expect). After two weeks you’ll be able to identify them without looking. For the first two days, every 7-Eleven transaction involved me holding a palmful of coins toward the cashier like I was feeding pigeons, waiting for them to pick out the correct ones.
The ¥5 coin, called go-en, is a pun — it sounds the same as the word for a good fortune or karmic connection. That’s why you’ll see people chucking ¥5 coins into shrine offertory boxes. I spent about ¥200 in five-yen coins at Meiji Shrine on my first morning in Tokyo and felt spiritually improved. The exchange rate on karma is probably bad but I don’t know.
The ATMs that work for foreign cards
Here is the part most articles bury: the ATM inside a Japanese bank will probably reject your foreign card. Mitsubishi UFJ, Mizuho, Resona, the lot of them. They look lovely and inviting, they have chairs in the lobby, they’re air-conditioned in August. Your card will not work. I have tested this.
The ATMs that do work are in three places:
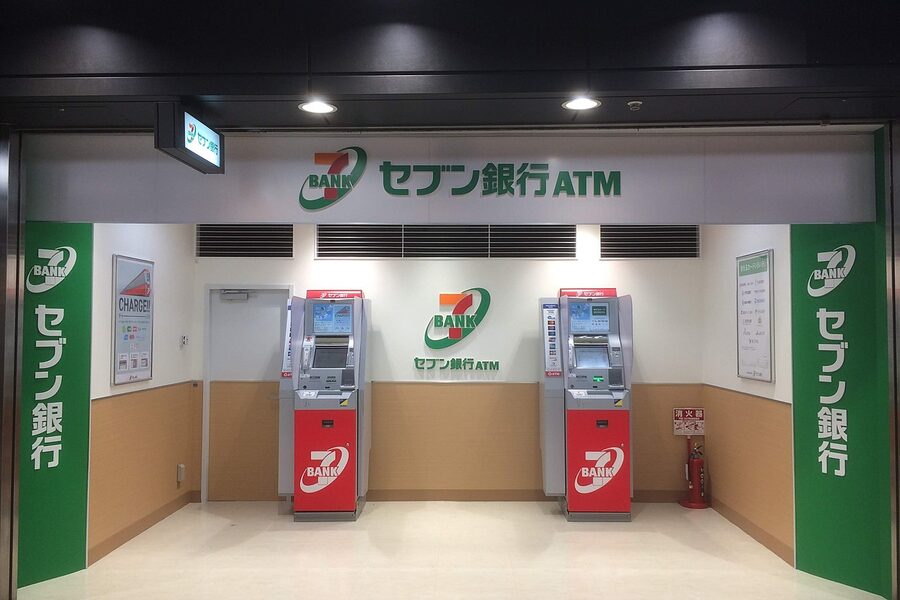
- Seven Bank ATMs — the green-and-red machines in every 7-Eleven, plus standalones in the arrivals halls at Narita, Haneda, and Kansai. Open 24 hours. Accept Visa, Mastercard, Amex, JCB, UnionPay, Diners, and Discover. Instructions in twelve languages. This is the one you want.
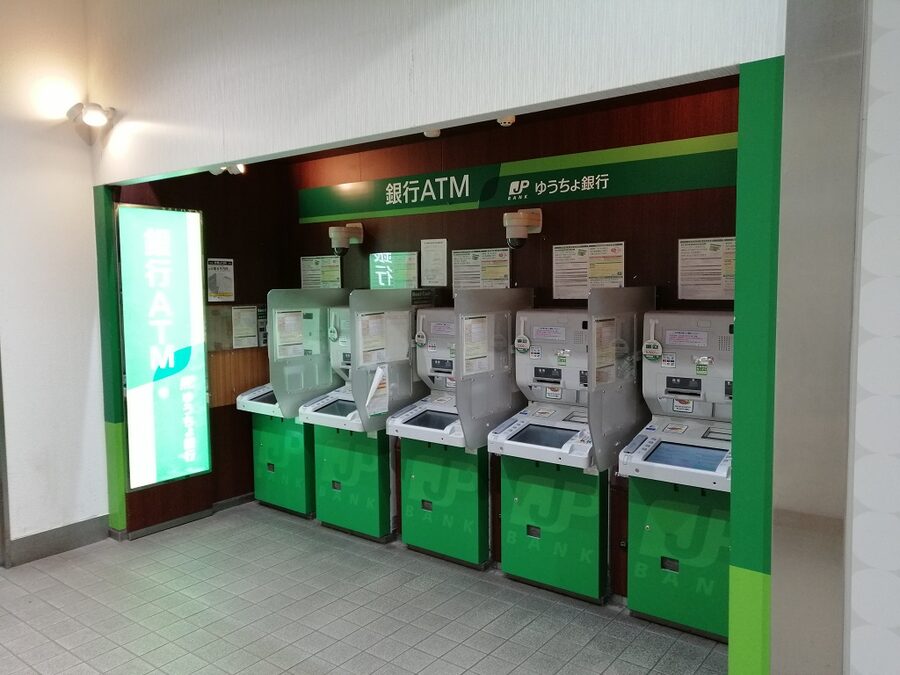
- Japan Post (Yucho) ATMs — in post offices and some FamilyMart stores. Also reliable. Only limitation is that post-office ATMs are often only open during post-office hours, which is 9am-4pm on weekdays and shorter on Saturday. Central post offices in Tokyo, Osaka, and Kyoto run closer to 24 hours.
- Lawson Bank ATMs — inside Lawson conbinis. Work with most foreign cards, 24/7 in cities.
E-net ATMs (inside FamilyMart) also work, sometimes. The SMBC Trust ATMs (Prestia, formerly Citibank) are fine but rarer. I’d ignore everything else.
One opinion I’ll stand on: skip the airport currency exchange counter. The rate there is always worse than what you get by withdrawing from the Seven Bank ATM that is, I promise, within 200 metres of the exchange counter. The same applies to hotel-desk exchange, which is the worst rate of all. The only time I’d break this rule is if every Seven Bank at Narita is queued five-deep at 11pm and you just want ¥5,000 to get a train ticket. Fine. But don’t change $500 for your whole trip at the airport.
How to withdraw at a 7-Eleven ATM
The whole thing takes under a minute once you’ve done it once. The default screen is in Japanese but the language button is immediately visible.
- Walk up to the ATM. It will usually be showing a welcome screen with a red “irasshaimase” greeting. Don’t touch anything yet.
- Tap “English” — or your preferred language. The Seven Bank machines offer twelve: English, Chinese (simplified and traditional), Korean, Portuguese, Spanish, Thai, Malay, Indonesian, Vietnamese, French, and German. The rest of the transaction will be in your chosen language.
- Insert your card. The slot lights up. The machine reads the chip — it does not release the card until the transaction is done, so you can’t leave without it. This has saved me twice.
- Select “Withdrawal”. On cards from checking or savings, pick “Savings” if the machine asks and you’re using a Schwab/typical US debit card. Visa Debit from the UK usually wants “Checking”.
- Enter your PIN. Four digits. Confirm.
- Enter the amount. In ¥1,000 units. The machine will quote the Seven Bank fee (usually ¥110 or ¥220 depending on time of day and card network). Your home bank may add its own fee on top — this is the one the machine can’t show you.
- Take cash, card, and receipt. Notes come out first, card second, receipt third. The machine will beep at you to remove each one. Don’t walk off halfway through — it really does beep.
Daily withdrawal limits: Seven Bank caps a single transaction at ¥100,000 (roughly a grand in any Western currency). Your own bank’s daily limit may be lower — mine was ¥50,000 for a while until I raised it. Some US banks default to ¥30,000. Worth checking before you fly.
Card acceptance, the real version
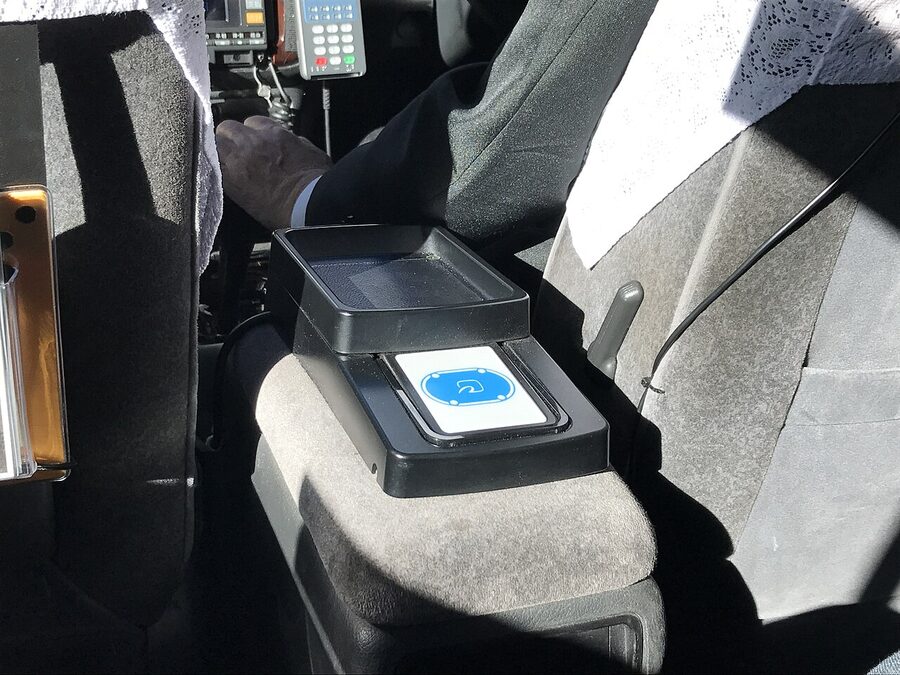
Here is the real picture. Places that will almost always take a Visa or Mastercard: hotels, department stores (Isetan, Mitsukoshi, Takashimaya), chain restaurants, conbini, electronics stores like Bic Camera and Yodobashi, most Tokyo taxis, the Ginza six and basically any shopping mall built in the last decade.
Places that might be cash-only: small ramen shops, small izakayas, small tonkatsu counters, small sushi places, some tempura specialists, most shrine and temple ticket counters, entry fees for small museums, market stalls at Tsukiji, and a lot of the little places that are actually the reason you came to Japan. The rule I use: if the building looks like it’s been there since before World War II, bring cash.
Amex works at hotels and department stores but is refused at about a third of places that take Visa. I’d bring one of each if you have them. Contactless tap is now everywhere at chain stores — the little radio-wave icon on the reader means you don’t even have to insert the card. A few merchants still don’t have contactless even if they have chip-and-PIN, which is why I carry a physical card rather than relying only on Apple Pay.
One warning about conbini: some of the older Lawson and FamilyMart self-checkout kiosks reject foreign chip cards while the human-staffed register next to them accepts them fine. If the screen throws an error at the self-service point, just move to the staffed till. It’s a machine-specific issue, not a your-card issue.
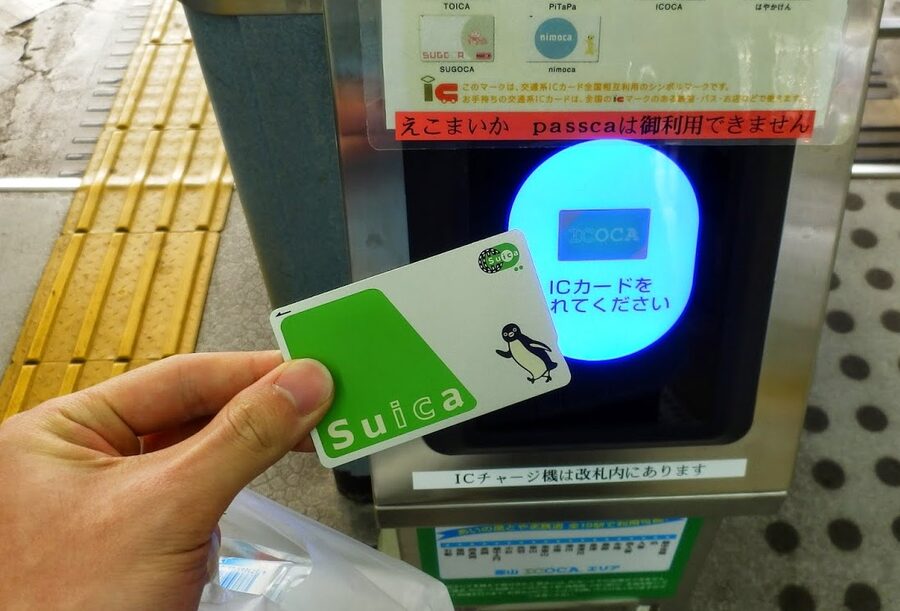
IC cards as a payment tool
The IC card is the single most useful thing you’ll own in Japan after your passport. Suica, Pasmo, and Icoca all do the same job — prepaid tap-to-pay cards you top up with cash. They started as train tickets and absorbed half the economy.
What you can tap a Suica on:
- Every train and subway gate in Tokyo, Osaka, Kyoto, Sapporo, Fukuoka, and twenty-odd other cities
- Buses (most of them)
- Every conbini (7-Eleven, Lawson, FamilyMart, Daily Yamazaki, Seicomart, Ministop)
- Most vending machines
- Coin lockers in stations
- Chain restaurants (McDonalds, Matsuya, Yoshinoya, Sukiya, many izakaya chains)
- Some taxis
- Museum and attraction ticket counters, increasingly
The max balance is ¥20,000, which is enough for a day of fairly heavy use including transport and lunch. Topping up is done at station machines with cash or at a 7-Eleven ATM — there’s usually a “Charge IC card” option on the same Seven Bank ATM you withdrew from. Pasmo and Suica are interchangeable for the user; the difference matters only to the companies selling them. Get whichever one is closest.
For a deeper look at IC cards and Tokyo trains in general, I wrote a separate guide to the Tokyo trains and the Suica card.
Paying with a Suica at the conbini — three steps
- Tell the cashier “Suica” or “IC” when they ask about payment, or point at the card. They’ll tap the register to switch from cash mode.
- Place the card flat on the reader pad. Beep. Don’t lift it until you hear the beep — the reader is slower than it looks.
- Check the screen for the deducted amount and new balance. That’s it. No signature, no PIN.
PayPay and the cashless-Japan reality
If you watch Japanese people paying, you’ll see a lot of them pointing phones at QR codes rather than tapping cards. That’s PayPay, or LINE Pay, or Rakuten Pay. Domestic cashless apps that dominate the conbini till and every little ramen shop that added them during the pandemic.
The answer for tourists: you can’t really use them. Almost all of them require a Japanese phone number and a Japanese bank account to register. Alipay and WeChat Pay work if you have accounts registered in China. Apple Pay works, sort of — you can add a Suica to it if you have an iPhone 8 or later, but a US or UK credit card added to Apple Pay will only work at places that specifically accept Visa or Mastercard contactless, which you could have paid with the physical card anyway. It’s not a game-changer for visitors.
So your working stack as a tourist is: cash, IC card, credit card. That covers 95% of situations. The PayPay gap — the other 5% — usually resolves with “sorry, cash?” and the shop accepts cash.
Currency exchange is the last resort
If you want to change USD or GBP or EUR for yen, the order of options from best to worst:
- Withdraw yen at a 7-Eleven ATM in Japan. You get the Visa/Mastercard interbank rate, which is almost identical to the mid-market rate, plus a fee of ¥110-220. Best rate by a clear margin.
- Currency exchange counter at Narita or Haneda. The rate is worse, maybe 2-3% off the interbank. Acceptable for small amounts if you’re in a rush.
- World Currency Shop, GINZA EXCHANGE, or similar exchange shops in Tokyo. Rate is OK-ish, similar to the airport. Useful if you need to change back at the end of your trip.
- Bank counter. Only open 9am-3pm on weekdays. Takes forever. Avoid.
- Hotel front desk. The rate is basically a joke. Don’t do it unless you’re desperate at 2am.
Don’t bring yen purchased in your home country. Your home bank charges a 4-8% markup on yen, which is substantially worse than any option in Japan. The one exception is if you’re nervous about arriving with zero yen — in which case get ¥5,000-10,000 at home for emergency taxi/train money, and withdraw the rest at the airport ATM.
No tipping, full stop
Tipping is not a thing in Japan. Restaurants, bars, taxis, hair salons, hotels — none of them expect it. In many places, leaving money on the table is considered confusing at best and faintly rude at worst. Staff will sometimes chase you out onto the street to return what they assume you forgot.
At high-end ryokan and some Western-style hotels there is a tipping-adjacent practice called kokorozuke — a small thank-you envelope given to the room attendant at the start of your stay — but it’s optional, culturally specific, and not for a one-night hotel stay in Shinjuku. For restaurant meals, the bill is the bill. If you want to say thanks, say gochisosama deshita on your way out. Free.
I have a fuller rundown of the rules in my guide to dining etiquette in Japan and more general pointers in Japan dos and don’ts for first timers. Both cover tipping and a fair amount besides.
The ¥10,000 note myth
A rumour that turns up in older guidebooks: using a ¥10,000 note to pay for something small is rude, staff will glare at you, and you should always carry small change. This is not true, and has never been true in my experience. A ¥10,000 note is the equivalent of a $100 bill in size, not in social consequence — the cashier will break it without comment, stack the change neatly on a little tray, and hand it back with both hands. No-one cares.
The only context where you genuinely need small change is buses and trams in smaller cities where the fare is a flat ¥220 or so and the driver carries limited change. On Tokyo buses it’s not usually an issue because you tap a Suica and skip the problem entirely.
Consumption tax and tax-free shopping

Japan has a 10% consumption tax (shouhizei), which has been 10% since October 2019. It is almost always included in the displayed price — the little ¥1,200 sticker on the T-shirt is the price you’ll pay at the till, tax already in. A few restaurants still show the pre-tax price as a large number and the inclusive price as a smaller number in brackets, but that’s rare.
Tourists staying fewer than six months can get the tax refunded at registered tax-free shops. This is the process:
- Spend at least ¥5,000 in one shop on one day. The threshold counts per shop, per day — you can’t combine receipts across Bic Camera and Don Quijote.
- Bring your passport. Physical passport, not a photo. The shop needs to scan the residence status page.
- Ask for tax-free at the till. Many shops have a separate tax-free counter. Some handle it at the normal register.
- Sign the declaration. The shop registers the purchase electronically with Japan Customs via the new digital system (paper forms ended in late 2023).
- Don’t open the sealed bag. Consumables — food, drink, medicine, cosmetics — are sealed in a clear plastic bag at the shop. You cannot open the bag until you’ve left Japan. Customs does spot-checks at the airport; a torn bag means you pay the tax back.
Durable goods (clothes, electronics, watches) are not sealed and can be used in Japan. The tax-free threshold applies to each category — consumables and durable goods — separately within the same shop, not combined. Large department stores like Isetan and Takashimaya have dedicated tax-free counters that handle the whole thing in ten minutes.
Note: there has been talk of shifting Japan’s tax-free system to a “pay tax, refund at airport” model. As of 2026, the shop-counter refund system is still standard. Check the National Tax Agency page at nta.go.jp if you’re arriving later in the year and want to confirm.
Wise, Revolut, Schwab — the no-fee-ATM strategies
If you’re staying more than a few days, the cards that reduce or eliminate withdrawal fees are worth the setup effort.
Charles Schwab (US) — the Schwab Bank Investor Checking debit card refunds all foreign ATM fees at the end of the month, and charges zero foreign-transaction fees. For US travellers this is genuinely the best single product for Japan. You need a Schwab brokerage account to open the checking, but the brokerage has no minimum and it’s all online.
Wise Multi-Currency Card (UK, EU, Australia, US, etc.) — holds JPY as a separate balance. You pre-convert USD or GBP to JPY in the app at the mid-market rate, then spend from the JPY balance with zero conversion fees. First £200 of ATM withdrawals per month are free; after that it’s £1.50 plus 1.75%. Good for a two-week trip if you plan withdrawals.
Revolut (UK, EU, some others) — similar to Wise. Free-tier ATM allowance is £200/month; paid tiers (Plus, Premium, Metal) raise the limit. Mid-market conversion on weekdays, small markup on weekends.
Monzo, Starling (UK), N26 (EU) — all offer fee-free or cheap ATM withdrawals in Japan. Check your specific tier for the monthly limit.
The thing none of these will save you from is the Seven Bank ¥110-220 machine fee, which is charged by Seven Bank regardless of card. Schwab refunds it. Wise/Revolut don’t. Still, a ¥220 fee for ¥50,000 is 0.44% — cheap as these things go.
How much to actually carry
My unscientific rule: ¥15,000 to ¥20,000 in cash for the first day in Tokyo, topped up as I run low. Here’s where I expect it to go:
- Breakfast at a conbini: ¥500-800 (Suica)
- Train and subway: ¥800-1,200 (Suica)
- Shrine or temple entry fee: ¥300-600 (cash only, small coins helpful)
- Lunch at a ramen shop: ¥1,000-1,500 (often cash only)
- Afternoon coffee or snack: ¥500 (often card or Suica)
- Dinner at an izakaya: ¥3,000-5,000 (may be cash only)
- Late-night taxi if you miss the last train: ¥2,000-4,000 (card usually works)
- Buffer: ¥3,000-5,000 for the thing you didn’t plan for
Adds up to around ¥12,000-15,000 on a normal day, plus slack for anything unexpected. If you plan to shop — and you probably will — double it.
Don’t carry all your trip’s cash at once. Japan is absurdly safe (it’s the kind of country where I’ve left a laptop on a café table to go to the bathroom and come back to find it exactly where I left it), but carrying ¥100,000 in cash on day one makes no sense when there’s a Seven Bank ATM within 500 metres of anywhere you’ll be. Withdraw as you go.
Practical info at a glance
- Currency: Japanese yen (¥, JPY). Notes: ¥1,000, ¥5,000, ¥10,000 (¥2,000 exists but is rare). Coins: ¥1, ¥5, ¥10, ¥50, ¥100, ¥500.
- Best ATM: Seven Bank (in every 7-Eleven, 24/7). Fee: ¥110-220 per withdrawal, depending on time and card. Max per transaction: ¥100,000.
- Backup ATMs: Japan Post (Yucho), Lawson Bank, E-net in FamilyMart.
- Consumption tax: 10%, almost always included in displayed price.
- Tax-free shopping: ¥5,000+ per shop per day, passport required, consumables sealed in bag.
- IC card cap: ¥20,000 balance on Suica/Pasmo.
- Tipping: None. Not in any context for short-term visitors.
- Contactless: Visa and Mastercard tap widely accepted at chains, hotels, most taxis.
- Best tourist cards: Charles Schwab (US), Wise, Revolut, Monzo, Starling (UK/EU).
- Official sources: Seven Bank, Japan Post Bank, JNTO currency page, Bank of Japan notes and coins.
What I’d actually do on day 1
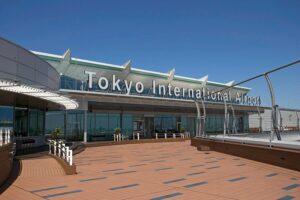
Land at Narita or Haneda. Clear immigration, pick up my bag. Walk past the currency exchange counter. Find the Seven Bank ATM — signage in every arrivals hall points to one, and there’s usually a standalone machine near the station entry. Withdraw ¥20,000.
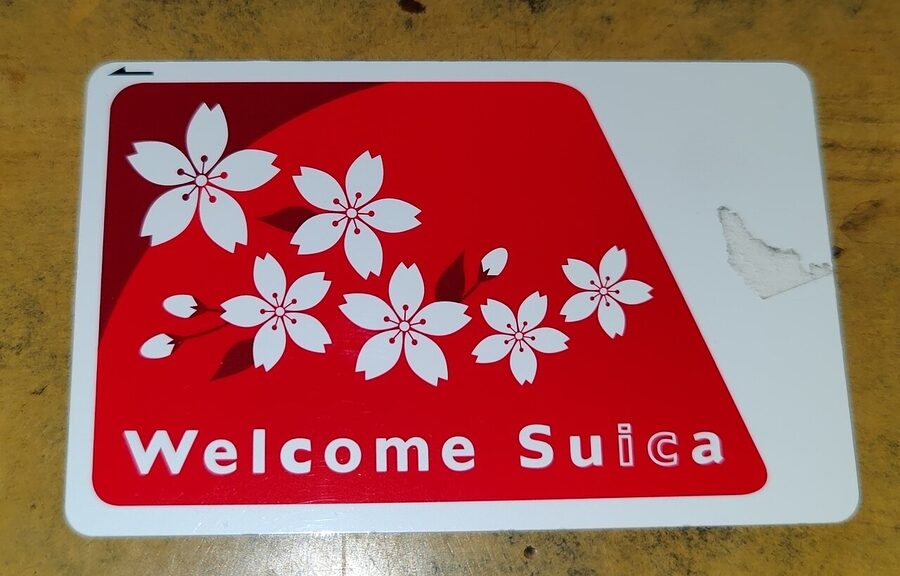
Buy a Welcome Suica at the JR East Travel Service Centre (at Narita Terminal 1/2 arrivals, or the Haneda arrivals) or a regular Suica at the ticket machine. Load ¥5,000 on it. Tap through the gate onto the Narita Express or the Keisei Skyliner toward central Tokyo.
Check in at the hotel with a Visa. Dump the bag. Walk to the nearest conbini, buy a rice ball and a bottle of tea for ¥400, tap with the Suica. Eat on a park bench. Walk to a ramen shop. Pay in cash. Look at the remaining ¥14,000 in my wallet and feel like the system is working.
The next day, do it again. You now live here. If you want a full day-by-day plan, I’ve written a three-day Tokyo itinerary that assumes you’ve read this and aren’t going to panic at the first card reader that sits unused on a ramen-shop counter.
_-_A.JPG)